Showing posts with label Appetizers. Show all posts

Sunday, October 4, 2015

Rajasthani Mirchi Pakoda/ Chili Cutlet


This is a popular street snack of Rajasthan also known as Jodhpuri Mirchi Vada.

With the Monsoon comes those hot fried crispy treats with hot beverages like Masala Chai and coffee
give you that warm feeling inside and make any rainy day perfect.

I know,by listening this recipe name, you must have started thinking of bharwa mirchi pakoda where mashed potato is stuffed inside slit bhavnagari mirchi.

Hang on...I did it in a different way with same ingredients.
Instead of stuffing, I have coated the mashed potato mixture outside the mirchi and prepared the pakora. This way You can restore the nutrients of seeds and flesh inside chili. It won't change the taste instead add more taste and flavors to it.


I am sharing with you guys the same. Make this quick chatpati dish and like me enjoy this hot & spicy pakodas accompained by a sip of masala chai.

INGREDIENTS :

For stuffing:

4 medium potatoes, boiled and mashed
1-2 green chili, chopped
2 tbsp coriander leaves, chopped
1/2 tsp fennel seeds, dry roasted and crushed
1/2 tsp coriander powder
1/2 tsp dry mango powder (substitute : Lemon juice )
1/2 tsp cumin powder
1/2 tsp red chili powder
pinch of asafoetida
salt as required

For batter:

1 cup gram flour
Water as required (To make thick batter)
Pinch of asafoetida
1/2 tsp carom seeds
1/2 tsp garam masala powder
1/2 tsp red chili powder
pinch of baking soda (optional)
salt as required

Other ingredients:

6 bhavnagri chilies
oil for deep frying

Method:

  1. Rinse the bhavnagari chilies with water. Keep them aside.
  2. With a knife slit each chili from one side. Slit from the top and keep 1 cm space at the bottom before the slit. 
  3. Slit all the green chilies this way and keep aside.
  4. Steam potatoes in a pressure cooker till they are cooked very well.
Preparing stuffing:
  1. Peel and mash the cooked potatoes.
  2. Add all the ingredients listed for stuffing and mix them very well.
Preparing Chili Pakora:
  1. Coat the potato mixture around the bhavnagari chili.
  2. Coat all green chilies this way. keep aside.
  3. In a bowl take all the ingredients listed for batter and make a medium thick batter. Add salt. add water as required. Don't make batter runny.
  4. Dip the mashed potato coated chili in the batter and coat it very well with the batter.
  5. Place it in medium hot oil gently.
  6. Add more chili pakoras in the oil and fry them till they are golden. Carefully turn the pakoras in the oil.
  7. When golden and crisp, remove the mirchi pakora.
  8. Place them on a kitchen paper towels to remove excess oil.
Serve these rajasthani mirchi pakora hot with tomato ketchup, coriander chutney.You can add them as side dish in lunch menu.


Saturday, May 16, 2015

Cauliflower in Pickling Masala (Achari Gobi)


Ingredients:

500 gms cauliflower, small florets
1 medium onion, finely chopped
1/2 cup tomato puree/finely chopped
4 cloves garlic, finely chopped
1 inch ginger, finely chopped
2 tbsp plain yogurt
1 tbsp sugar (optional)
1/2 teaspoon mustard seeds
1/2 teaspoon nigella seeds
1 tbsp chili powder
2 tbsp lemon juice (if you want more sourness)
1/2 cup cilantro leaves, finely chopped
3 tbsp of oil to fry Cauliflower + 1 tbsp oil for cook Achari Gobi
Salt as required

For the pickling masala

2-3 dry red chillies (You can roast Green chillies if you don't want red chillies)
1 tsp fenugreek
1 tsp nigella
1 tsp mustard seeds
1 tsp fennel seeds
1 tsp cumin seeds
1/2 inch cinnamon (optional)

Method:

Preparation of pickling masala:
  1. Dry roast the spices in low flame.
  2. Grind it to fine powder.
Preparation of Achari Gobi :
  1. Marinate the cauliflower florets with some salt and turmeric.
  2. Heat oil and saute till they are half cooked. It should retain the crunchiness.
  3. Once done, take it out of the pan and keep it aside on kitchen towel.
  4. In the same pan, add 1 more tbsp of oil if oil left in pan is not sufficient. 
  5. Heat oil and add nigella seeds and mustard seeds. 
  6. Once it starts sputtering, add garlic, ginger.
  7. Immediately as chopped onions. Toss it.
  8. Season with salt and stir well.
  9. Saute the onion till it gets softened or translucent.
  10. Add the pickling spice you prepared freshly.
  11. Mix well and cook in medium flame until the spices are cooked and oil starts separating from the sides. 
  12. Keep stirring to avoid it from getting burnt at the bottom. This should take about 10 minutes.
  13. Add lemon juice to it. Mix well.
  14. Add the tomato puree or finely chopped tomatoes. I prefer to use the latter.
  15. Season with salt and sugar (if using). 
  16. Cook for another 10 minutes and make sure to have tomato puree mixed properly with rest of the ingredients. If using chopped tomatoes, cook till it starts melting.
  17. Add the chili powder and yogurt. Mix well. Cook in medium heat.
  18. Add the partially fried crunchy cauliflower. Give a toss.
  19. Cook for another 5 minutes, check for seasoning and add any if required.
Serve hot with Indian bread or steamed rice.


Friday, May 15, 2015

Baby Corn Chilli Fry


INGREDIENTS:

15 baby corn, diagonally cut
1 small green bell pepper, thinly sliced

1 inch ginger, finely chopped
4 green chilies, slit
5 garlic, finely chopped
1 cup finely chopped onion/spring onions
1 tbsp soy sauce or as required
1 tbsp white vinegar (optional)
1 tbsp chopped celery
1 tbsp black pepper powder
2 tbsp water
1 tsp corn flour to be sprinkled from above
Salt as required
Sugar as required (optional)
Oil to shallow fry/deep fry the baby corn
2 tbsp oil for the sauce

For the batter:

2 tbsp all purpose flour (optional)
4 tbsp cornflour (If not using all purpose flour, then take 6 tbsp of cornflour)
water as required to make a thick paste
salt and pepper as required

METHOD:

Preparing the batter:

  1. Make a smooth paste with the corn flour, all purpose flour, salt, pepper and water.
  2. Rinse and paper dry the baby corn.
  3. Heat oil on a frying pan.
  4. Dip each baby corn piece in the batter and coat it well with the batter.
  5. Deep fry the baby corn on medium flame till the edges and sides are golden brown.
  6. Drain the baby corn on kitchen towels.


Preparing the sauce:

  1. In pan, heat about 2 tbsp oil.
  2. Once hot, add chopped onions or spring onions, ginger, garlic and slit green chilies.
  3. stir fry on a high flame till the onions have become translucent. If you cannot handle high flame, do it on medium flame.
  4. Add green bell pepper and stir fry till the they have partly cooked but still retain their crunch.
  5. Add the soy sauce and mix well.
  6. Sprinkle black pepper powder, salt and sugar (if using). 
  7. Add 2 tbsp water and stir.
  8. Sprinkle 1 tbsp of corn flour. 
  9. Mix well and cook for  about 1-2 minutes.
  10. Add white vinegar and stir again.
  11. Add the deep fried baby corn with chopped celery to this mixture. Mix well.
  12. check the taste and add salt, pepper or soy sauce if required.

Serve chilli baby corn as a starter or with veg fried rice.


Saturday, May 9, 2015

Mini Eggplant Pizza

Globe eggplant is a spongy, mild-tasting vegetable that's meaty yet low in calories.  It's never eaten raw, but it can be baked, grilled, or sautéed.   The best eggplants are firm and shiny eggplants with unbroken skin.


In this recipe the eggplant is wonderfully flavoured and meshed so well with the pizza toppings.
Instead of sauce you can use slice of tomato.
I eat the whole eggplant since no one else likes eggplant.
It has protein from cheese and veg, sometimes I make garlic toast to go with it.
Also before oiling eggplant, I season oil with Italian seasoning... yummy!

To make it Hawaiian, you can add cubes of ham and pineapple-much more flavor that way. give it a try.

Add some protein more. Ham, sausage, pepperoni. anything. You will not dissapointed.

Pleasantly surprise on how simple, quick and tasty this recipe was try and I will be trying this one again and sharing.

Ingredients: 

1 globe eggplant, 9-10 inches long
1 Tbsp salt, for drawing water out of eggplant (optional)
2 Tbsp olive oil, for brushing eggplant before roasting
2 tsp dried Italian seasoning, for sprinkling on eggplant before roasting
10 large basil leaves, cut in chiffonade strips (optional)
1/3 cup finely grated Parmesan/mozzarella
hot red pepper flakes for sprinkling finished pizza (optional)

To prepare Sauce:
3 tsp extra-virgin olive oil
3 large garlic cloves, finely chopped
2 cups diced fresh tomatoes
1/2 tsp dried Italian seasoning
1/4 tsp dried oregano
Salt as required

Method:

  1. Remove the stem from the eggplant,then cut it into 3/4 inch thick slices.
  2. Sprinkle salt on both sides of slice.  (You can skip this, it will just make the slices brown. Sprinkling salt prevents slices from browning)
  3. Keep the salt coated slice about 10 minutes to draw out the water. 
  4. Meanwhile turn on the oven to 190C.
Preparing Sauce:
  1. Heat 3 tsp olive oil.
  2. Once hot,add finely chopped garlic and saute in medium flame for about 1 minute or till raw aroma goes away. Don't let it brown.
  3. Add the diced tomatoes.
  4. Once it starts melting, add dried Italian seasoning and dried oregano.
  5. Let the sauce cook at a low simmer until it's thickened. 
Preparing Pizza:
  1. After 10 minutes, wipe the eggplant dry with paper towels, it 
  2. also take the salt out.
  3. Take the bake tray and apply/spray the olive oil on it.
  4. Lay eggplant slices on, brush/apply the tops and sides of the eggplant slices with olive oil.
  5. Roast the eggplant about 25 minutes or till the slices are done. Make sure not to over-baked that slices lose their shape.  
  6. While the eggplant roasts, finely slice the fresh basil leaves (if using).
  7. Combine freshly grated Parmesan and low-fat mozzarella. 
  8. After 25 minutes or when eggplant pieces are done, remove the slices from the oven.
  9. Spread a few tablespoons of sauce on the top of each eggplant slice.
  10. Sprinkle with thin basil slices (if using) and top with a generous amount of cheese.  
  11. Put pizzas in oven with broil mode and let it broil until the cheese is melted and slightly browned. This took 8 minutes for me.


Sprinkle red paprika flakes and dried oregano on pizza.Serve hot


Sunday, April 19, 2015

Pomfret Recheado

A traditional goan fish preparation is originated from portuguese cuisine.
Recheado means “stuffed” in Portuguese.
A tangy spicy with little sweetness paste best suited for most seafood dishes like shrimps and mackerels. 
Tried this mix and the outcome was just wonderful. The flavor and taste was so authenticate.
It looks super tempting and the recipe is truly unique, loved it:)


INGREDIENTS

4 medium sized whole pomfret
16 Garlic cloves
1 and 1/2 Inch Ginger chopped
1 and 1/2  tbsp Cumin seeds
4 Tamarind Pieces
10 Peppercorn
4 Green Cardamoms
8 Red dried Chiles/roasted green chillies
5 Cloves
2 and 1/2 tsp Turmeric
1 tbsp Sugar (optional)
10 tbsp Vinegar
10 tbsp Oil to fry
4 tbsp Semolina
2 tbsp Rice flour/Wheat flour
Salt as per taste

To garnish :
Onion slices
Tomato slices
Mint leaves
Coriander leaves
Lemon slices

METHOD

  1. Clean the pomfrets and remove the unwanted flesh from the mouth with your hands and discard them. 
  2. Make a few slits on the fish including the sides of the fish.
  3. Combine all the above listed ingredients except oil, semolina and flour (garlic, ginger, cloves, pepper corn, cardamom, Red chilies, tamarind(without seeds), sugar, turmeric, salt in a grinder). 
  4. Add vinegar to it and blend them to a smooth thick paste. 
  5. Stuff this paste into the pomfret's slits and coat this paste on the outer cover of pomfrets. 
  6. Keep the pomfrets for about an hour or overnight.
  7. Heat oil in a pan on low flame.
  8. Take semolina and flour in a plate and mix well.
  9. Dip the marinated pomfrets in the above mixture. Coat them from both the sides.
  10. Shallow fry the pomfret from both sides until crisp and brown in color from both sides.
  11. Place the fried pomfrets on tissue napkins to remove excess oil from them.


Garnish with sliced onion, mint leaves, coriander leaves and lime.
It tastes terrific with pav, bread, roti or just have it. This Pomfret Fish is a must try.

Thursday, April 16, 2015

Stuffed Capsicum


INGREDIENTS 

4 medium capsicum
4 medium potatoes
⅓ cup steamed peas
1 medium onion, finely chopped
2 to 3 green chili, chopped
1 tsp cumin
1 tsp turmeric powder
1 tsp red chili powder
A pinch of asafoetida
1 tsp dry mango powder or 1 tsp lemon juice
1 tsp garam masala
2 tsp chopped coriander leaves
1.5 tbsp oil for sauteing the onions
1 tbsp oil for brushing the capsicum
Salt as required

METHOD

Preparing the stuffing:

  1. Boil the potatoes. Peel and grate/mash the potatoes. Keep aside.
  2. Heat oil in a pan. Once hot, add the cumin seeds.
  3. Once they start spluttering, add chopped onions.
  4. Saute the onions till translucent. 
  5. Add chopped green chilies.
  6. Add turmeric powder, red chili powder, asafoetida. stir again.
  7. Add the potatoes and mix well.
  8. Saute the potatoes for 2 mins.
  9. Add garam masala powder, dry mango powder/lemon juice and salt.
  10. Mix well and then add chopped coriander leaves. Mix again. Keep aside.
Preparing the Stuffed Capsicum:
  1. Remove the top of the capsicumand slice it off. Remove the seeds. 
  2. Brush oil outside the bell peppers.
  3. Stuff the potato stuffing in the capsicum.
  4. Heat oil in a pan and place the stuffed capsicum in the pan.
  5. Cover the pan and cook the stuffed capsicum on a low flame.
  6. Check in every 5 mins and keep on changing the sides of the capsicum.
  7. Make sure that all sides are cooked well. 
  8. Fry them till the capsicums get golden and wrinkled.
Serve these stuffed capsicum warm with rotis, steamed rice.


Note:

You can also bake them at 200 degree celsius for 15 to 20 minutes. Make sure to bake capsicum till it turns golden and wrinkled.

Monday, March 16, 2015

Egg Manchurian (Dry)


Marinated boiled egg deep fried then sauteed with onions, bell peppers along with a mixture of sauces makes this wonderful appetizer or side dish. If you don't like egg yolks, you can remove it and make this Manchurian just with cooked egg whites.


Ingredients:

Boiled eggs (sliced lengthwise as 4 pieces) 6 nos 
2 tbsp Cornflour
1/4 tsp Ginger garlic paste
1/4 tsp Green chili paste
Salt

For dry gravy:

1 no Onion(diced)
2 nos Capsicum (julienne cut)
4 nos Garlic cloves (chopped)
2 tbsp Soy sauce
2 tbsp Tomato ketchup
1 tsp Vinegar
Salt to taste (if needed)
Oil for deep frying the eggs
Oil for sauteing


Method:


  1. Combine cornflour, salt, garlic-ginger paste and the green chili paste in a large bowl, 
  2. Mix well with water to get a thick batter.
  3. Heat oil in a pan. Dip the sliced boiled eggs in the batter,drop gently to the hot oil and  fry in oil.
  4. Remove from the oil and transfer to a paper towel lined plate..
  5. In a pan, add some oil. Put high flame.
  6. When it smokes add the chopped onions and capsicum and saute for few seconds.
  7. Add the chopped garlic, salt and fry for a minute.
  8. Add the soy sauce and vinegar,stir for a minute.
  9. Add the tomato ketchup and then add fried eggs.
  10. Stir continuously for a couple of minute, take it out from heat.
  11. Garnish with chopped spring onions if needed.
Serve hot with noodle or fried rice or as appetizer..


Sunday, February 22, 2015

Cheese Garlic Bread


Simple. Cheesy. Garlicky. Carby… delicious.

Cheese and bread are one of those things that I could never give up. Put some corn or sliced baby corn or sausage on top and add a sprinkle of sea salt – so so good!

Perfect to go with pasta dishes or soups! So easy and so good, you won’t be able to stop eating it!

With this particular recipe, I do take a little help from the store and buy a loaf of French baguette or Italian bread from the bakery, but feel free to make a loaf of bread from scratch if you wish.


INGREDIENTS:

3 slices of French bread (cut into 1-inch thick slices)
4 tbsp of shredded Mozzarella Cheese (You can add parmesan or asiago as per your wish)
3 tbsp of finely minced garlic
FInely minced parsley
3 tbsp butter
Optional Salt if you are using unsalted butter
1 tbsp teaspoon Italian seasoning/oregano 
3 tbsp Sweet Corn
Optional Chopped Green Chillies

METHOD:
  1. Place a rack in the center of the oven and preheat to 200 degrees C.
  2. Using a knife, spread butter over the bread. 
  3. Sprinkle garlic and parsley.
  4. Bake in the oven for 2 minutes. Ensure not to burn garlic.
  5. Remove from oven and Top with shredded cheese and sweet corn (optional green chillies) 
  6. If you want crispy garlic bread, broil bread for an additional 3 minutes or until cheese melts. If you want soft garlic bread, bake it till cheese melts.
  7. Sprinkle small pinch of Italian seasoning/oregano. 
Serve warm!


Wednesday, February 4, 2015

Multani Paneer Tikka

Tikka itself is a very popular Indian appetizer, with such appetizing colors, flavor and aroma. Multani Paneer Tikka is a very different recipe where paneer is stuffed with Mushrooms and Spring Onions coated with corn flour/besan batter and shallow fried. 
 It can be served as a as starter or as an accompaniment and is one of the easiest of all paneer dishes. 


Ingredients:

Cottage cheese 500 gm

Grated cheddar cheese 4 Tbsp 
Chopped white mushroom 2 cups
Chopped spring onions 1 cup 
Chopped  green chillies 1 tbsp
Chopped ginger 2 tsp 
Chopped coriander leaves  3 tsp
Garam masala  1/2 tsp (substitution: pav bhaji masala + dry mango powder)
Pepper powder 1 tsp 
Cumin seeds 1 tsp 
Besan or cornflour 1/2 cup 
Salt to taste
Refined oil 1 tsp 
Oil to shallow fry


Method:


  1. Slice paneer gently into long thin sheets.
  2. Heat 1 tsp oil on a pan. Add spring onions and mushrooms and Saute it with medium flame. Season with salt, garam masala, pepper and cumin. The mushroom will start leaving water. Allow the mixture to be absolutely dry.
  3. Add chopped ginger and mix well, then let it cool.
  4. Add coriander leaves, green chillies and grated cheese.
  5. Mix all the ingredients well.
  6. Put the mushroom mixture on the paneer sheet.
  7. Spread it evenly up to half the length of the sliced paneer and fold.
  8. Prepare a smooth batter with corn flour/besan and water. 
  9. Dip the stuffed paneer in this batter.
  10. Shallow fry in a non stick pan till they are golden brown.


Serve hot with mint chutney.

Tuesday, February 3, 2015

Achari Baingan (Eggplants with pickling spice)


When you hear the word 'Achar' in the name of the recipe, it is obvious for many people to think this dish is a pickle made with brinjal
But the recipe does not use any actual achar or pickle.  
This recipe wins as my favorite hands down. It is so flavorful and the combination of the tomatoes, eggplant and the spices…Its spicy and tangy!!! 
This recipe uses 5 exotic spices which are also called 'Panch Phoran'. I am a not so fond of baingan or eggplant still this is one recipe which I recommend for all baingan lovers and non-baingan lovers.

Serve it with warm steamed rice, warm chapatis, parathas, or pitas Or take it to work and eat it together and make your co-workers jealous! I'm sure it will be yummy with a bowl of curd rice too.


Ingredients:


Ingredients:
8 Baby Eggplants/aubergines 
1 tsp Ginger Paste
2 tbsp Oil (Preferably mustard oil)
¼ tsp Asafoetida
2 sprigs Curry Leaves (Optional but recommended)
Salt to taste

Oil to deep fry


For the Pickling Spice Mix:


2 Tbsp coriander seeds, dry roasted

1 Tbsp fennel seeds dry roasted
1 tsp cumin seeds, dry roasted
1 1/2 tsp fenugreek seeds
2 tsp white mustard seeds
1/2 tsp black onion seeds/ nigella seeds
1/2 tsp carom seeds
4 tsp dry mango powder
1/4 tsp turmeric powder
Red chilli powder, to taste
1 tsp garam masala


To toss the aubergines:

5 Tbsp mustard oil

2 bay leaves
3-4 cloves
2 pinches heeng dissolved in 2 Tbsp water
Salt, to taste


Method:


  1. Slice the aubergines into four leaving them attached only at the stem. Lightly dab the brinjal on the inside with some salt and turmeric powder. Deep fry. Keep them aside.
  2. In a pan, dry roast coriander seeds, fennel seeds, fenugreek seeds, nigella seeds and cumin seeds. Grind these with all the other masalas on the ingredient list. Mix salt in it.
  3. Stuff the deep fried aubergines with this masala. Keep aside.
  4. In a wok, take mustard oil, add curry leaves, ginger paste, cloves and asafoetida water. Saute it for 1 minute.
  5. Add the stuffed aubergines. Toss.
  6. Sprinkle some salt according to taste. Toss. Serve.

Saturday, January 24, 2015

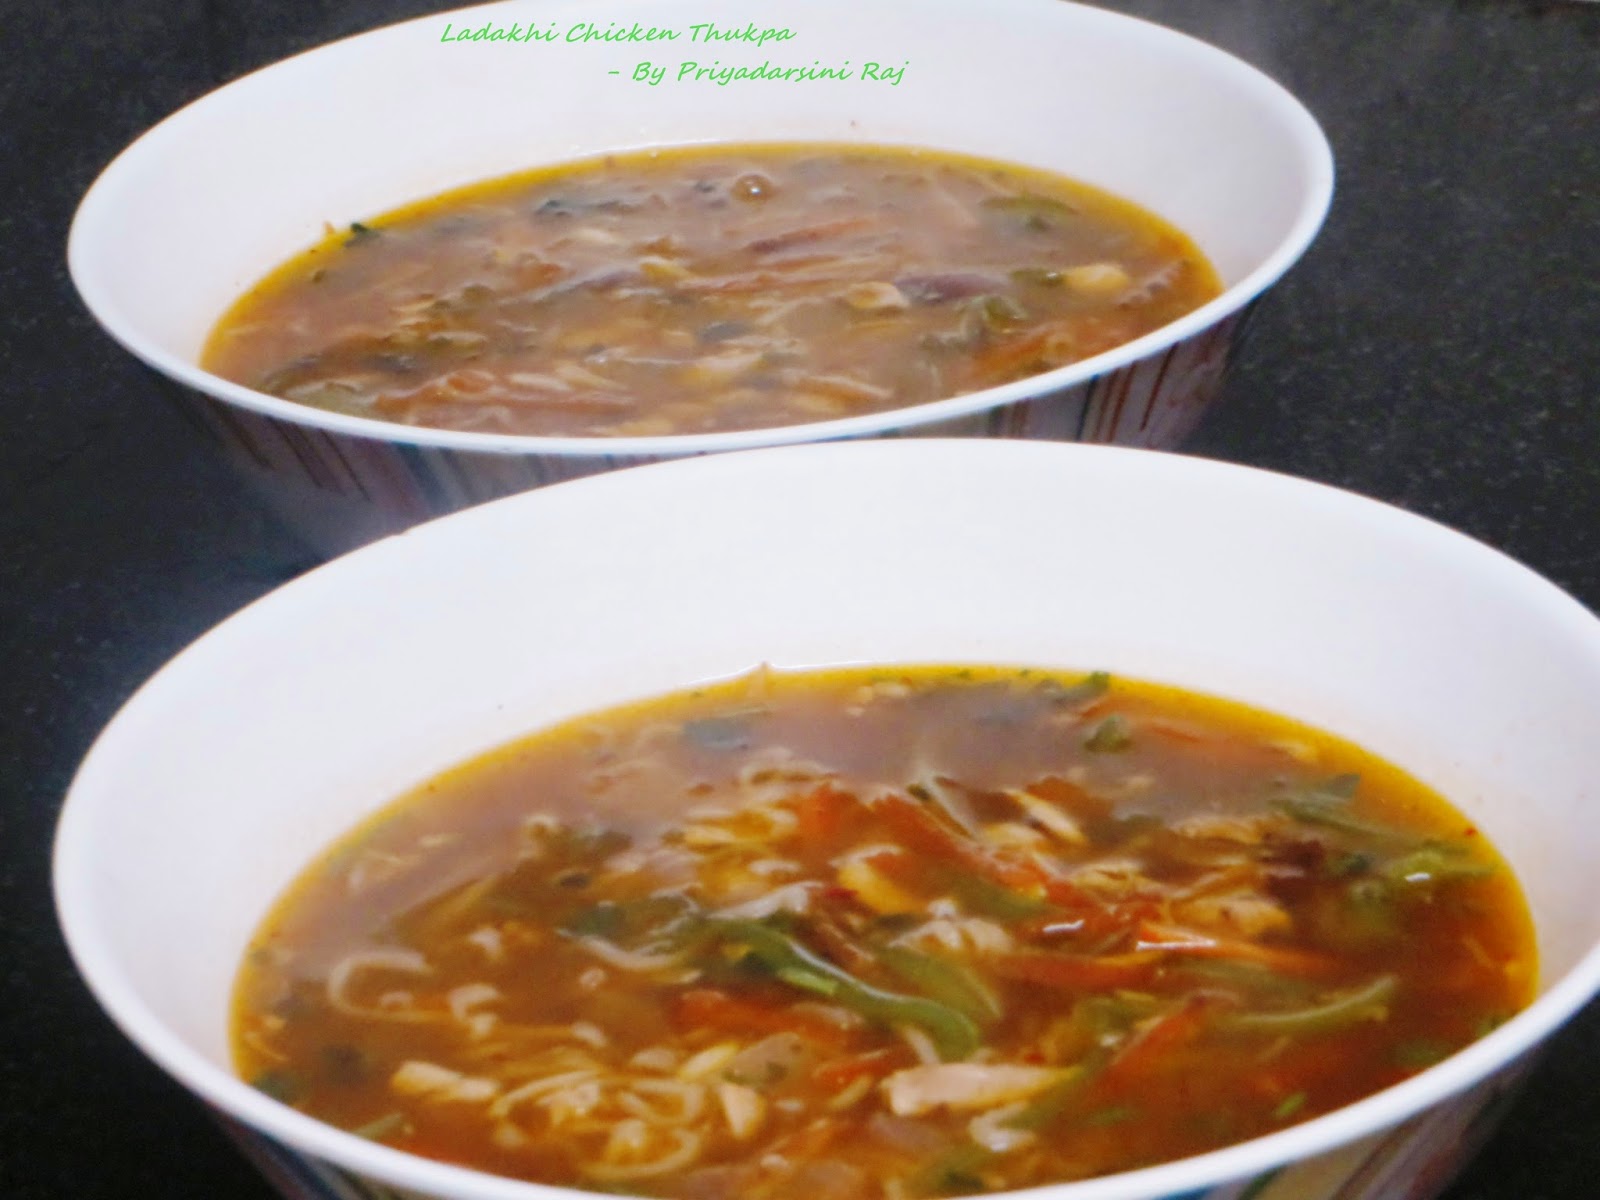
Chicken Thukpa - Ladakhi Style

It is popular in Tibet, Bhutan, Nepal, and some parts of India. "Thuk" means heart so it is a heart warming dish. Fragrant, hearty and simple to prepare, this hot bowls of thukpa recipe is an easy midweek winter warmer.  Ultimate bliss on a cold winter day.
The first time I had this soup was in one of small outlet in a mall, the name itself got me interested as to what it might be,and I haven't forgotten the taste ever since.
Then i heard my mother-in-law talking about this recipe she had it in Darjeeling.
Out of sheer curiosity, i started research on it and got to know more about it.
What i love about this recipe is that all the ingredients of this soup are so handy, can make them anytime. You dont have to put much effort to make it tasty. In which way you prepare it, it will never disappoint you in terms of flavours and taste.
This recipe ingredients varies from region to region.
I have followed Ladakhi style.
A very good recipe. Very simple and makes a good weeknight dinner. As is I would say the below measurement feeds 2 people max, so u may want to double it for more people. Also if kids r going to be eating it, wld suggest adding chillies only in the garnish and not in the soup, as it becomes quite spicy. 

Enjoy this simple and easy to make and no-frills Thukpa and stay a little warmer in these cold days.


Ingredients:

Chicken legs  2
Onion 1
Carrot 1
Green Bell pepper 1
Ginger 1 inch
Spring onions 7
Green chilies 3
Coriander leaves
Garlic 4-5 cloves 
Salt
Lemon 1 tbsp
Water 500 ml 
Soy sauce 1 tsp
Olive oil 2 tbsp 
Handful of egg noodles (or regular noodles)

Method:
  1. Take chicken legs in a stockpot. Pour water into the stockpot to cover the chicken completely. Cover the stockpot and boil the chicken on medium heat.
  2. (Optional: You can add a bit of Salt, a Bay Leaf, Cinnamon Stick, 2 Cloves, Quarter Onion, 2 cloves of Garlic, a small pc. of Ginger to water while boiling chicken)
  3. Once the Chicken is cooked, remove and allow it to cool down and remove the bones from boiled chicken leg, shred or cut to pieces. 
  4. Transfer the stock in another bowl. Reserve it. 
  5. Julienne ginger. Cut carrots into fine little sticks (1 and 1/2 inch). Slice the bell pepper vertically.
  6. Chop 5-6 spring onions and halve 3 green chilies. Finely chop 4-5 garlic cloves.
  7. Heat 2 Tbsp olive oil and add the chicken cubes. (You can fry till it turns golden brown, i prefer not to fry it so much)
  8. Now add chopped onion and sliced carrot to the chicken.
  9. Then add ginger, garlic, spring onions, bell pepper and green chilies. 
  10. Sprinkle salt, pepper and some fresh coriander leaves and saute.
  11. Add the reserved stock and let it simmer for about 2-3 minutes.
  12. Squeeze in 1/2 lemon.
  13. Add 1 tsp of soya sauce.
  14. Stir the broth gently and cover it. Let it simmer away for 10 minutes.
  15. Add handful of egg noodles in the broth and cook for 5 minutes.
Garnish with some spring onions, green chili and fresh coriander.

Friday, January 23, 2015

Crispy Hash Breakfast Skillet


Tender-but-crispy hash brown along with crunchy bell pepper and bacon with a luscious baked egg in the middle.


These are awesome! So creative and perfect dish. You have breakfast. Or brunch, or a snack. Whatever time you decide to eat this, you will be munching happy.
when I first decided to try these out, I was so excited.
These looked great and I couldn't wait to surprise Hubby with them.

I have to begin with the hash. First I tried grating potato from a raw state.
Squeezing them to release as much liquid as possible before they are cooked. 
This makes sense. Potatoes are loaded with moisture, which makes browning difficult. 
By getting rid of excess water, the potatoes should brown more evenly and quickly.
Then baked them until they were not quite tender enough to eat, Soft.
The consistency was perfect and the potato flavor was fabulous.(But i did not get the desired brown color :( )
I seasoned it with freshly ground black pepper.

Then I added rest ingredients. The original recipe only has bell pepper and bacon.
I added mushroom and tomato to add more flavours to this recipe. 

Cracked the egg and baked it
Ta-da. Its ready. A golden crust tops a savory egg mixture of cheese, hash-brown potatoes and spices in this wonderful way to start the day!  A slice of whole grain bread, a glass of orange juice. An energizing breakfast.
Got a YUM-MYY from my husband!


I tend to gravitate towards poached eggs and their evenly cooked whites and soft creamy yolks. Hence this recipe grabbed the showstopper position in the breakfast menu :)

These look like a sure winner for kid's breakfasts, lunches or suppers!! They will love it!
Try it and be happy :)


Ingredients:

Medium Russet  potatoes (or sweet potatoes) 2 
Bacon 3 strips 
Large bell pepper, chopped 1  
Chopped Mushroom 2 tbsp
Chopped Tomato 2 tbsp
Salt 1 tsp
Ground pepper 1/4 tsp 
Eggs 4 
Shredded smoked gouda cheese 1/3 cup 
Chopped parsley (optional)

Methods:

  1. Wash and scrub the potatoes clean.
  2. Shred the potatoes by using the largest holes of your box grater.(You can peel them or leave the peels on, whichever you prefer. I always prefer to have skin)
  3. Place the shredded potato in a large bowl lined with a paper towel. 
  4. Press down hard so the paper towels can absorb a lot of the moisture. Squeeze more using more paper towels if necessary. (Or you can wrap shredded potato up in a kitchen towel, and squeeze them out over the sink/ reuse in any other recipe)
  5. Transfer the shredded potatoes to a plate and Cook in the microwave on high for 2 minutes. Set the potatoes aside.
  6. Place a skillet on the stove.
  7. Before you turn the heat on, put your three strips on the pan. Keep the flame low.
  8. Cook the bacon on both sides just before they become crispy. 
  9. Remove from heat, reserve the grease, and set bacon on a plate. Once the bacon is slightly cool, chop it up.
  10. Preheat oven to 400F degrees.
  11. Turn the stove heat up to medium. When bacon grease begins to simmer, add the shredded potatoes. 
  12. Mix well. Allow to cook for about 2 minutes. 
  13. Add chopped mushroom and cook it for 1 minute. 
  14. Add the chopped pepper, salt, and pepper. Stir it around once or twice. Allow to cook for 3 minutes. Stir again, then allow to cook for 2 more minutes till the potatoes turns slight brown. 
  15. Stir in the chopped bacon and cook for 2 minutes.
  16. Add chopped tomato and stir once. Remove skillet from the heat and flatten out the top of the hash. 
  17. Make 4 shallow indentations into the hash using the back of a spoon.
  18. Top with shredded cheese.
  19. Crack an egg into each indentation.  
  20. Transfer skillet to the oven and bake until the egg whites set. (It will take about 8-10 minutes) Season with salt and pepper to taste and top with the parsley.

Serve immediately.


Notes:

  1. If you do not wish to add bacon, you may leave it out. Since potatoes are cooked in the bacon grease, instead you may use 2 Tablespoons of unsalted butter.
  2. You may use your favorite cheese instead of gouda cheese. 

Thursday, January 15, 2015

Onion Pakora


Onion Pakora / Fritters are very easy to prepare and requires less effort. 

INGREDIENTS:

Large sized onions 2 
Gram flour 1 cup (I prefer to add 1/2 cup only, so that onion texture and taste will be prominent)
Green chilies  2 (or ½ tsp red chilli powder)
Chopped coriander leaves (optional) 1 tbsp
Turmeric powder(optional) ¼ tsp
Carom seeds 1 tsp 
Asafoetida/hing (optional) a generous pinch
oil for shallow frying or deep frying
Water as required to make a medium thick batter
Salt as required


METHOD:

  1. Slice the onions thinly and take them in a bowl. 
  2. Add chopped green chilies. (Optional : you can add chopped coriander leaves, red chilli powder)
  3. Add carom seeds, turmeric powder, asafoetida and salt.
  4. Mix well. Keep the onion mixture for 5 minutes. ( As the onions would release water and then you can add water as required in the batter.)
  5. Add gram flour and add required amount of water to make medium thick batter.
  6. Stir the mixture very well with a spoon or with your hands. Now the batter is ready.
  7. Heat the oil, add spoonfuls of the batter. (Depending on the size of the kadai or pan, you can add less or more fritters/pakoras, don't over crowd the pakoras while frying.)
  8. Deep fry pakoras till it turns golden brown, turn over with a slotted spoon and continue to fry.
  9. Turn the pakoras few times for even frying.
  10. Fry the onion pakoras, till they look crisp and golden evenly.
  11. Remove them with a slotted spoon and drain them on kitchen paper towels for excess oil to be absorbed.
  12. Fry slit green chilies in the same oil.
  13. Sprinkle some salt on the green chilies and mix well.

Serve onion pakoras or kandi bhaji or onion fritters with the fried green chilies or mint chutney or tomato sauce.


TIPS:
1. Slice the onions thinly as thin slices will get cooked faster than thick slices and while frying the gram flour gets cooked but the onion slices remain half cooked if sliced onion is thick.
2. You can use a pinch of baking soda in the batter to add that extra crispiness to the pakoras. 
3. You can add 1 or 2 teaspoon of oil  in the batter. This makes the onion pakoras crisp and it absorbs less oil while frying. 

Friday, January 2, 2015

Delicious Butter Garlic Calamari


You can't just go wrong with butter and garlic combination for this calamari.
Being hedonist after my own heart, and this delicious recipe only goes to prove it. 
I can think of nothing better than feasting on massive amounts of calamari.
Keep the squid rings/calamari in the freeze, take it out in the morning at breakfast or let it thaw in time for the evening's meal or starter for party. You won't be disappointed ever. Easiest and the simplest recipe 

The infusing  flavour of the garlic into the squid will always be showstopper 


INGREDIENTS:

Squids ( cleaned and cut in rings) 2 cups 
Butter 2 tbsp 
Finely chopped/crushed garlic 1 tbsp
Pepper powder 1 tbsp
salt (as per taste)
oil

METHOD:


  1. Set the heat on a high 
  2. Take butter on pan and when it sizzles, add chopped garlic and saute it till it turns  light brown and butter is nicely flavored with garlic
  3. Season with salt and pepper
  4. Now add squid rings and toss them for 2 mins
  5. Remove from flame. Drain them on a oil absorbent paper. Serve them hot
You can sprinkle li'l amount of lemon juice on it, if you wish.

Note:
Squid ideally needs just a few minutes to cook. When over cooked it tends to turn chewy and rubbery.

Pan Fried King fish


Crisp Heavenly ‘Golden Delights’
This classic mouthwatering dish is my one of my favourite !
King Fish is a flavorful fish by itself so it does not need too much masala or anything added to it. This is a simple basic preparation that enhances its natural flavour.
This fish gets cooked very fast, so it gets ready in less than 5 minutes and is heaven on a plate


Ingredients:

King Fish (Surmai) 4-5 Fillets
Oil to fry

For batter:

Besan 1/2 cup
Garlic & Ginger paste 3 tbsp
Green Chilli paste 2 tbsp (as per your taste)
Turmeric powder 1 tbsp
Red chilli powder 1 tbsp
Salt to taste
Oil 2 tbsp
Water (as needed)

To Garnish:

Lemon 1 slice

Method:
  1. Roast the besan and Mix it with rest of the ingredient to make a smooth batter 
  2. Keep it in refrigerator for 1 hour
  3. Keep the non-stick griddle (tawa) on flame and wait till it’s hot enough
  4. Dip the fish fillet in the batter (Make sure this masala is applied generously over the fish pieces) 
  5. Place the fish pieces in the pan and shallow fry till the undersides are golden
  6. Flip them over and shallow fry till the other side is equally golden. 
  7. Drain on absorbent paper. Serve hot garnished with a lemon slice.

It can be served as starters and can be given along with salad.

Note: To make this recipe low fat, the batter can be used for marination and marinated fish slices can be grilled with minimum or no oil. 

Thursday, December 25, 2014

Baked Potato Skins loaded with bacon


Baked Potato Skins loaded with bacons n loads of cheddar cheese
I tried it at TGIF and from then I became a big fan of it...These were delicious.
Packed with melted cheddar, applewood-smoked bacon, tangy sour cream, and a sprinkling of scallions, they're bursting with bold flavor. They're easily one of our favorite game-day appetizers. Such a great idea for a group of hungry football fans, especially with the chilly weather we have been having lately.

I wanted to prepare it from a long time....at last i got some time...
And I recreated restaurant recipe, I can’t think of a better way to use up potato skins than to make these delightful baked potato skins. Save the meat of the potatoes to make mashed potatoes or potato soup. 


INGREDIENTS:

Russet potatoes 6
Butter melted 2 Tbsp
Salt, to taste
Black pepper, to taste
Shredded cheddar cheese 1 cup
Pre-cooked Bacon pieces 8 Tbsp


For the Sour Cream and Chives Dip:

Sour cream 1 cup 
Salt 1/2 Tbsp
Black pepper (or to taste) 1/2 Tbsp

Fresh chives, chopped 4 Tbsp

METHOD:

For Dip:

  1. Thoroughly mix ingredients together and chill until ready to use
For Baked Potato Skins loaded with bacons:
  1. Preheat the oven to 400ºF.
  2. Scrub the potatoes under cold water and dry with a paper towel
  3. Make two lengthwise cuts through each potato   
  4. Put potatoes in a casserole dish or on a baking tray
  5. Bake for about 35 minutes, or until the skins are crispy and the potatoes are fork tender 
  6. Remove from the oven, and let the potatoes cool
  7. Scoop out the flesh, leaving 1/4 inch of potato in the skins
  8. Brush the potatoes with melted butter, sprinkle with the salt and pepper
  9. (Optional) bake halves face down in the oven for 6 to 8 minutes
  10. Remove from the oven, carefully flip the halves over, and sprinkle insides the cheese and bacon
  11. Place back under broiler for just another minute to allow the cheese to melt
Serve immediately with Sour cream and Chives dip.


If you'd prefer not to fry the skins, brush the scooped out skins with 1/4 cup of melted butter and broil for 5 to 7 minutes until brown around then edges, then top with bacon and cheese and proceed as in the instructions for fried potato skins.