Showing posts with label Breakfast Recipes. Show all posts

Saturday, May 9, 2015

Mini Eggplant Pizza

Globe eggplant is a spongy, mild-tasting vegetable that's meaty yet low in calories.  It's never eaten raw, but it can be baked, grilled, or sautéed.   The best eggplants are firm and shiny eggplants with unbroken skin.


In this recipe the eggplant is wonderfully flavoured and meshed so well with the pizza toppings.
Instead of sauce you can use slice of tomato.
I eat the whole eggplant since no one else likes eggplant.
It has protein from cheese and veg, sometimes I make garlic toast to go with it.
Also before oiling eggplant, I season oil with Italian seasoning... yummy!

To make it Hawaiian, you can add cubes of ham and pineapple-much more flavor that way. give it a try.

Add some protein more. Ham, sausage, pepperoni. anything. You will not dissapointed.

Pleasantly surprise on how simple, quick and tasty this recipe was try and I will be trying this one again and sharing.

Ingredients: 

1 globe eggplant, 9-10 inches long
1 Tbsp salt, for drawing water out of eggplant (optional)
2 Tbsp olive oil, for brushing eggplant before roasting
2 tsp dried Italian seasoning, for sprinkling on eggplant before roasting
10 large basil leaves, cut in chiffonade strips (optional)
1/3 cup finely grated Parmesan/mozzarella
hot red pepper flakes for sprinkling finished pizza (optional)

To prepare Sauce:
3 tsp extra-virgin olive oil
3 large garlic cloves, finely chopped
2 cups diced fresh tomatoes
1/2 tsp dried Italian seasoning
1/4 tsp dried oregano
Salt as required

Method:

  1. Remove the stem from the eggplant,then cut it into 3/4 inch thick slices.
  2. Sprinkle salt on both sides of slice.  (You can skip this, it will just make the slices brown. Sprinkling salt prevents slices from browning)
  3. Keep the salt coated slice about 10 minutes to draw out the water. 
  4. Meanwhile turn on the oven to 190C.
Preparing Sauce:
  1. Heat 3 tsp olive oil.
  2. Once hot,add finely chopped garlic and saute in medium flame for about 1 minute or till raw aroma goes away. Don't let it brown.
  3. Add the diced tomatoes.
  4. Once it starts melting, add dried Italian seasoning and dried oregano.
  5. Let the sauce cook at a low simmer until it's thickened. 
Preparing Pizza:
  1. After 10 minutes, wipe the eggplant dry with paper towels, it 
  2. also take the salt out.
  3. Take the bake tray and apply/spray the olive oil on it.
  4. Lay eggplant slices on, brush/apply the tops and sides of the eggplant slices with olive oil.
  5. Roast the eggplant about 25 minutes or till the slices are done. Make sure not to over-baked that slices lose their shape.  
  6. While the eggplant roasts, finely slice the fresh basil leaves (if using).
  7. Combine freshly grated Parmesan and low-fat mozzarella. 
  8. After 25 minutes or when eggplant pieces are done, remove the slices from the oven.
  9. Spread a few tablespoons of sauce on the top of each eggplant slice.
  10. Sprinkle with thin basil slices (if using) and top with a generous amount of cheese.  
  11. Put pizzas in oven with broil mode and let it broil until the cheese is melted and slightly browned. This took 8 minutes for me.


Sprinkle red paprika flakes and dried oregano on pizza.Serve hot


Tuesday, April 28, 2015

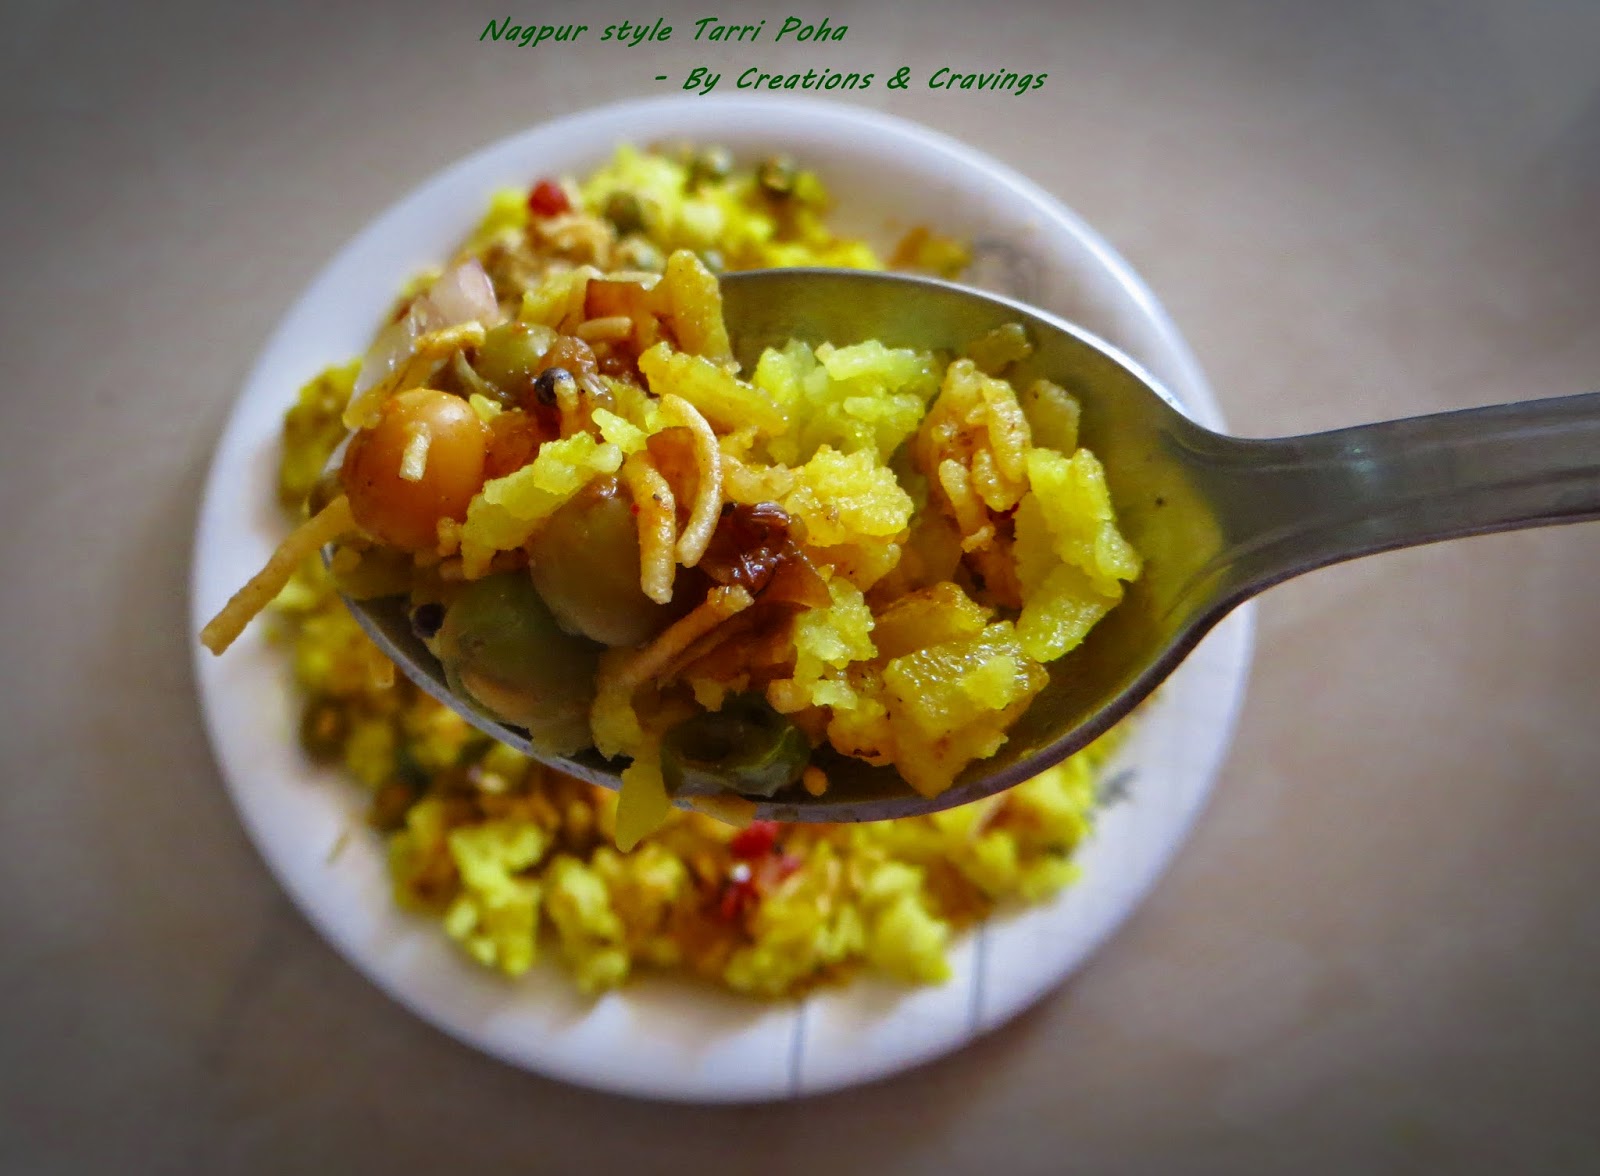
Tarri poha

Tarri poha is a quintessential dish that is popular across all parts of Maharashtra especially in Nagpur. A plate of piping hot poha is one comfort food that is healthy.

In Nagpur, its popular as a street food. Many vendors sell poha in the wee hours of the morning. They serve it along with a tarri which has thin gravy made extremely spicy and a piece of tomato. Tomato balances the spiciness.


INGREDIENTS:

To prepare Aloo poha:
2 cup thick flattened rice
1 medium sized Onion, julienne
3 Green chillies, chopped
1 Potato, cut in medium size
1 tbsp Oil
1 tbsp Mustard seeds
1 tbsp Cumin seeds (jeera)
1 tsp Turmeric powder
Salt to taste

To garnish:
Grated fresh/dry coconut to garnish (Optional)
Coriander leaves to garnish
1 Lemon

To prepare chick pea curry:
1 and 1/2 cup dried green chickpeas, soaked overnight
1 tbsp Oil
1 tsp Mustard seeds
1 tsp Cumin seeds
1 tsp Turmeric powder
1 tbsp Garlic-ginger paste
1 medium sized Onion, chopped
1 Tomato, chopped
6 Curry leaves
1 tsp Red chilli powder
Salt to taste
Garam masala
1 cup water
Coriander leaves

To garnish:
 Sev
 1 Small onion, chopped
 1 tbsp Lemon juice

METHOD:

Preparation of aloo poha:

  1. Heat oil in a non-stick wok on medium flame.
  2. Add mustard & cumin seeds. 
  3. Add the onion & green chillies, saute till the onion becomes translucent. (You can brown it also if you want)
  4. Add turmeric powder and salt. Mix well.
  5. Once it starts splutter, add potatoes.
  6. Cover the lid and let it fry till potatoes are cooked.
  7. Take flattened rice in a bowl. Add water and clean it.
  8. Drain the water immediately. 
  9. Now add this soaked flattened rice.
  10. Saute the poha for 5 mins on medium flame. 
  11. Garnish the poha with grated coconut and coriander leaves

Preparation of Chickpea curry:
  1. Wash the soaked chick peas and pressure cook the green vatana till two whistles.
  2. Heat oil in a wok. Add mustard & cumin seeds.
  3. Once it starts spluttering, add the curry leaves, chopped onion & saute till the onion turns golden brown.
  4. Add the garlic-ginger paste & saute till the raw aroma goes away.
  5. Add the turmeric powder & red chilli powder. 
  6. Add chopped tomato. Saute till it melts.
  7. Add garam masala.
  8. Add salt to taste and add the cooked green chick peas.
  9. Add one cup water & let it boil for 5-10 mins.
Preparation for Tarri poha:
  1. Place the aloo poha on the plate. 
  2. Pour the curry over the poha slowly.
  3. Garnish with some sev, chopped onion and coriander leaves.
  4. You can add lemon juice, if you want.

Serve the hot tarri poha.
       

Wednesday, February 4, 2015

Multani Paneer Tikka

Tikka itself is a very popular Indian appetizer, with such appetizing colors, flavor and aroma. Multani Paneer Tikka is a very different recipe where paneer is stuffed with Mushrooms and Spring Onions coated with corn flour/besan batter and shallow fried. 
 It can be served as a as starter or as an accompaniment and is one of the easiest of all paneer dishes. 


Ingredients:

Cottage cheese 500 gm

Grated cheddar cheese 4 Tbsp 
Chopped white mushroom 2 cups
Chopped spring onions 1 cup 
Chopped  green chillies 1 tbsp
Chopped ginger 2 tsp 
Chopped coriander leaves  3 tsp
Garam masala  1/2 tsp (substitution: pav bhaji masala + dry mango powder)
Pepper powder 1 tsp 
Cumin seeds 1 tsp 
Besan or cornflour 1/2 cup 
Salt to taste
Refined oil 1 tsp 
Oil to shallow fry


Method:


  1. Slice paneer gently into long thin sheets.
  2. Heat 1 tsp oil on a pan. Add spring onions and mushrooms and Saute it with medium flame. Season with salt, garam masala, pepper and cumin. The mushroom will start leaving water. Allow the mixture to be absolutely dry.
  3. Add chopped ginger and mix well, then let it cool.
  4. Add coriander leaves, green chillies and grated cheese.
  5. Mix all the ingredients well.
  6. Put the mushroom mixture on the paneer sheet.
  7. Spread it evenly up to half the length of the sliced paneer and fold.
  8. Prepare a smooth batter with corn flour/besan and water. 
  9. Dip the stuffed paneer in this batter.
  10. Shallow fry in a non stick pan till they are golden brown.


Serve hot with mint chutney.

Tuesday, February 3, 2015

Chicken Shawarma in Pita Pocket


In Arab countries, Israel, Mexico, Pakistan, South Africa and the United Kingdom, Shawarma is widely popular and the meats, fillings and sauce vary depending on the country. Traditionally, Shawarma is made with chicken, lamb, beef, or goat that has been marinated overnight and is wrapped and cooked on a vertical rotisserie.


When an order is placed, meat is shaved off and served as a wrapped in pita bread or flatbread with fresh vegetables (cucumbers, tomato, lettuce, onions), pickles and a sauce or two (garlic mayonnaise and tahini).
Thinly sliced meat, wrapped in a pita bread with veggies and sauce is a delicious quick meal.

Though shawarma is made in different different ways so I thought I would try out a simple homemade version. I do not have a vertical rotisserie or a kebab grill at home. I opted to cook our chicken shawarma on a griddle pan. First marinate the chicken in a blend of yoghurt and spices, then cook the chicken and assemble the shawarma in pita bread.
Another great way to make your own Shawarma is by using leftover chicken from a BBQ. Slice it up and follow the steps below to get a mouth watering shawarma roll.

Ingredients:

For chicken Marination:
700gms of thinly cut skinless boneless chicken breast
½ cup of lemon juice
1 cup of plain (Greek) yogurt
1/4 cup of white vinegar
2 cloves of garlic, crushed
1 tbsp of olive oil
Salt  to taste
½ tsp of ground oregano (or thyme)
1 tsp of paprika
½ tsp of ginger powder (optional)
1 tsp ground allspice (or substitution : 1/3 tsp ground cinnamon + 1/3 tsp ground cloves +1/3 tsp nutmeg powder)


For Sauce:
Tahini (i did not put it, i am not fond of it)
2 cloves garlic, crushed
1/4 cup lemon juice
2 tablespoons yogurt

For Spread:
Mayonnaise 

For Pita Pocket:  (Makes 8 Rounds)
1 cup warm water 
2 teaspoons active dry or instant yeast
2 1/2 - 3 cups all-purpose flour
2 teaspoons salt
1-2 teaspoons olive oil (optional)

For PITA Fillings:
8 loaves of pita bread 
thinly slice cucumbers
thinly sliced onions
thinly sliced tomatoes
1/2 cup fresh parsley, finely chopped
pickle slices (optional)


Method for Pita Pocket:
  1. Mix the water and yeast together, and let sit for about five minutes until the yeast is dissolved. Add flour, salt and olive oil.
  2. Knead the Dough for about 5 minutes till the dough is smooth and elastic.Add more flour as needed to keep the dough from sticking to your hands or the work surface.
  3. Set the dough in bowl and coat it with oil. Cover with a cloth and Let the Dough Rise till it is doubled in volume.
  4. Once the dough rises, divide the Pitas into 8 equal pieces and gently flatten each piece into a thick disk. Sprinkle the pieces with a little more flour and then cover them with a kitchen towel, wrap until you're ready to bake them.
  5. Roll one of the pieces into a circle 8-9 inches wide and about a quarter inch thick. Lift and turn the dough frequently to make sure the dough isn't sticking to work surface. Sprinkle with a little extra flour if it sticks. Repeat with the other pieces of dough. 
  6. While shaping the pitas, heat the oven to 450°C. Place a large baking sheet on the middle rack to heat.
  7. Place the rolled-out pitas directly on baking sheets (as many as will fit), and bake for about 3 minutes. The pita will start to puff up after a minute or two and is done when it has fully ballooned. 
  8. Keep cooked pitas covered with a clean dishtowel while cooking any remaining pitas.
  9. Pitas are best when eaten immediately after cooking. Leftover pitas will keep in an airtight bag for several days and can be eaten as they are or warmed in a toaster oven. 
Method for Chicken Shawarma in Pita Pocket:
  1. Rinse the boneless chicken breasts with fresh cold water then cut horizontally into thinner cuts of about ½ inch (each breast could possibly be split into 2 slices depending on thickness).
  2. Combine all ingredients except for chicken and Mix in a blender, add to a bowl and mix well with the chicken, cover and let marinate in the fridge overnight.
  3. When ready, grill the marinated chicken using a George Foreman grill for about 15 minutes on medium heat. (Optional : You can also cook the chicken on a BBQ grill)
  4. Combine sauce ingredients and mix well. Set aside.
  5. Take the onions, tomatoes, cucumbers and add other filling ingredients in a large bowl and combine well.
  6. When the chicken is done, you can shred it, slice it or leave into large pieces. 
  7. Spread a quarter of the sauce down the center of each pita.
  8. Stuff the pita pocket with the shredded chicken mixture and then top it up fillings.

Friday, January 23, 2015

Crispy Hash Breakfast Skillet


Tender-but-crispy hash brown along with crunchy bell pepper and bacon with a luscious baked egg in the middle.


These are awesome! So creative and perfect dish. You have breakfast. Or brunch, or a snack. Whatever time you decide to eat this, you will be munching happy.
when I first decided to try these out, I was so excited.
These looked great and I couldn't wait to surprise Hubby with them.

I have to begin with the hash. First I tried grating potato from a raw state.
Squeezing them to release as much liquid as possible before they are cooked. 
This makes sense. Potatoes are loaded with moisture, which makes browning difficult. 
By getting rid of excess water, the potatoes should brown more evenly and quickly.
Then baked them until they were not quite tender enough to eat, Soft.
The consistency was perfect and the potato flavor was fabulous.(But i did not get the desired brown color :( )
I seasoned it with freshly ground black pepper.

Then I added rest ingredients. The original recipe only has bell pepper and bacon.
I added mushroom and tomato to add more flavours to this recipe. 

Cracked the egg and baked it
Ta-da. Its ready. A golden crust tops a savory egg mixture of cheese, hash-brown potatoes and spices in this wonderful way to start the day!  A slice of whole grain bread, a glass of orange juice. An energizing breakfast.
Got a YUM-MYY from my husband!


I tend to gravitate towards poached eggs and their evenly cooked whites and soft creamy yolks. Hence this recipe grabbed the showstopper position in the breakfast menu :)

These look like a sure winner for kid's breakfasts, lunches or suppers!! They will love it!
Try it and be happy :)


Ingredients:

Medium Russet  potatoes (or sweet potatoes) 2 
Bacon 3 strips 
Large bell pepper, chopped 1  
Chopped Mushroom 2 tbsp
Chopped Tomato 2 tbsp
Salt 1 tsp
Ground pepper 1/4 tsp 
Eggs 4 
Shredded smoked gouda cheese 1/3 cup 
Chopped parsley (optional)

Methods:

  1. Wash and scrub the potatoes clean.
  2. Shred the potatoes by using the largest holes of your box grater.(You can peel them or leave the peels on, whichever you prefer. I always prefer to have skin)
  3. Place the shredded potato in a large bowl lined with a paper towel. 
  4. Press down hard so the paper towels can absorb a lot of the moisture. Squeeze more using more paper towels if necessary. (Or you can wrap shredded potato up in a kitchen towel, and squeeze them out over the sink/ reuse in any other recipe)
  5. Transfer the shredded potatoes to a plate and Cook in the microwave on high for 2 minutes. Set the potatoes aside.
  6. Place a skillet on the stove.
  7. Before you turn the heat on, put your three strips on the pan. Keep the flame low.
  8. Cook the bacon on both sides just before they become crispy. 
  9. Remove from heat, reserve the grease, and set bacon on a plate. Once the bacon is slightly cool, chop it up.
  10. Preheat oven to 400F degrees.
  11. Turn the stove heat up to medium. When bacon grease begins to simmer, add the shredded potatoes. 
  12. Mix well. Allow to cook for about 2 minutes. 
  13. Add chopped mushroom and cook it for 1 minute. 
  14. Add the chopped pepper, salt, and pepper. Stir it around once or twice. Allow to cook for 3 minutes. Stir again, then allow to cook for 2 more minutes till the potatoes turns slight brown. 
  15. Stir in the chopped bacon and cook for 2 minutes.
  16. Add chopped tomato and stir once. Remove skillet from the heat and flatten out the top of the hash. 
  17. Make 4 shallow indentations into the hash using the back of a spoon.
  18. Top with shredded cheese.
  19. Crack an egg into each indentation.  
  20. Transfer skillet to the oven and bake until the egg whites set. (It will take about 8-10 minutes) Season with salt and pepper to taste and top with the parsley.

Serve immediately.


Notes:

  1. If you do not wish to add bacon, you may leave it out. Since potatoes are cooked in the bacon grease, instead you may use 2 Tablespoons of unsalted butter.
  2. You may use your favorite cheese instead of gouda cheese. 

Wednesday, January 14, 2015

Soft Idli recipe


IDLI IS A WHOLESOME MEAL FOR THE BREAKFAST. Nothing is better than a soft idli with a bit spicy , loads of coconut, tempered along chana dal & garlic. to die for. By this u can say I am the die heart fan of Idli and extra coconut chutney.

I would see the way my mom would soak the rice, dal and then grind it and then leave it to ferment. She used to put damp muslin cloth on idli mould and used to steam idli. this was a regular festive ritual in my house and i knew that we would get steaming hot soft idlis or dosa with chutney for breakfast.

I was thinking that time its very easy to prepare idli...when i actually started preparing the batter and then idly...then i came to know its easy to make batter but not so easy to make soft and fluffy idlis

As far i know fomentation is important to get best results for idlis and dosa...so definitely temperature and favourable environment for wild yeast to ferment is really needed

After so much of research on this, i got some ideas to make idli soft and fluffy
1. Add handful poha/cooked rice
2. Methi seeds with urad dal and poha

I went for 2nd option. Finally i got the desired textures for idli and even dosa became crisp and got beautiful golden color


INGREDIENTS:

Basmati rice or sona masoori rice or regular rice 2 cup 
Urad dal/black gram( skinned whole or skinned spilt) ½ cup 
poha/flattened rice ¼ cup 
fenugreek seeds ¼ tsp 
water as required
salt
oil to apply to the idli moulds

METHODS:
  1. Take both the rice and urad dal in different bowl and wash them.
  2. Soak the rice and poha in water for 6 hours.
  3. Soak the urad dal with methi seeds separately for 6 hours.
  4. Drain the soaked urad dal. reserve the water.
  5. Grind the urad dal, methi seed with some of the reserved water till you get a smooth and fluffy batter.
  6. Grind the rice to make a smooth batter.
  7. Mix both the batters in a large bowl. Add salt and mix well.
  8. Cover and let the batter ferment for 8 hours. In cold temperatures you can easily keep the batter for about 12-16 hours or more. (The batter will become double in size and rise after the fermentation process is over.)
  9. Mix the batter gently.
  10. Grease with oil the idli moulds and pour the batter in the moulds.
  11. Steam the idlis in a steamer for 10-12 mins or until the idlis are done.
Serve the steaming hot idlis with coconut chutney and sambar.

Note:  You can store the batter for 2-3 days.

Saturday, December 27, 2014

Methi Thepla


Methi thepla are flatbreads made from fresh fenugreek leaves, whole wheat flour and gram flour can be munched anytime of the day. These are light as well as healthy, filling and release energy slowly which is beneficial for health and performing daily tasks. They are also low in calories and saturated fats. A good snack for children who don’t like greens....along with fenugreek you can also add some other greens like spinach or amaranth in the dough.....this way you can incorporate some greens in their diet.

See the recipe...u will find it easy…. ain’t it? Methi thepla also serve best when travelling or for tiffin box lunch with some sweet mango pickle or lime pickle. You can also have methi thepla with a simple jeera aloo or even as a snack with indian chai.

Apart from the great taste and flavor I also like that the thepla are complete food with cereal, vegetable and dairy!! All these great features make them perfect healthy choice for packing in lunch box.

INGREDIENTS:

Whole wheat flour  1 cup 
Gram flour 1 cup 
Chopped fresh fenugreek leaves 1 cup (can be used more than it, i prefer to go for 3 cups)
Cumin powder or whole cumin 1 tsp 
Coriander powder 1 tsp 
Carom seeds 1 tbsp
(optional) Asafoetida 1/4 tsp
Turmeric ½ tsp 
Red chili powder 1 tsp 
Green chilli-ginger-garlic paste 1½ tsp
Oil 2 tbsp
Water or curd/yogurt 1 to 2 tbsp
Salt as required
Oil for frying

METHODS:


  1. Mix all the ingredients except water/curd
  2. Start kneading without adding water first as the fenugreek leaves leave a lot of water
  3. Just add 1 tbsp or 2 tbsp water/curd, if the dough become sticky, then just add some more wheat flour
  4. keep the dough aside for 15-20 minutes covered with a kitchen towel
  5. Now make medium sized (1") balls from the dough and roll each ball thinly into flat discs
  6. Heat a frying pan and place the thepla on the pan
  7. When one side is half cooked, flip it 
  8. Apply ½ or 1 tsp oil on the cooked side
  9. Now again flip and apply ½ or 1 tsp oil on the other side
  10. Flip again twice
  11. Once the thepla is cooked as well as browned, remove from the pan
  12. Make rest of the the theplas this way
  13. Stack them up and keep in a hot case / roti basket or covered in a kitchen napkin.


Serve methi theplas with curd, mango or lime pickles, or alu ki sabzi, you can also have methi theplas plain with indian chai.

Friday, December 5, 2014

Hot Dog in Breakfast


Good morning to all

Its Saturday Morning 
For some people it’s a perfect day to rest and relax...they miss breakfast and go for brunch :) It all depends on mood. (OK, OK, it depends on when they wake up.)
I believe that breakfast is THE most important meal of the day. I try my level best not to miss this one meal.
I want to make something quick coz I hate standing in the kitchen for too long.

So what's next ????
Find out one recipe full of protein and crunchy veggies...
First recipe idea that came to me when i searched in fridge was Hot Dog :)
The hotdog is perfect for basically any time of day.  Breakfast, lunch, brunch and yes, dinner too!  

Spread your dog with a blend of mayo and mustard sauce I love its the rich creaminess. 
Top with fresh veg as per your wish  which will give crunchiness.It's Delish !
These hotdogs look awkward to eat ;)
but trust me they fold up easy enough and I was able to eat mine without making much of a mess :P


Ingredients

For the stuffing
8 pickled jalapenos, thinly sliced
3 tablespoons finely diced onion
1 lime, juiced
2 tbsp olive oil
3 tbsp chopped fresh cilantro leaves
Salt
Freshly ground black pepper
3 tbsp mayonnaise
5 tbsp mustard sauce


For the sausage and bun
4 garlic chicken sausage
2 hot dog buns, split 3/4 of the way
1 tbsp Garlic & Herb Butter
1/2 cups grated white Cheddar(Optional)


Method :

In the bottom of a large bowl, Combine 1 tbsp olive oil and the onions. 
Season with lime juice, salt and pepper

For the Bun and Sausage:


  1. Preheat the grill to high. Grill sausage until golden brown on all sides, about 7 minutes.Remove to a plate. 
  2. Place buns on the grill cut side down and grill until lightly golden brown, about 20 seconds 


or 


  1. Heat a large nonstick skillet over medium-high heat. Add in 1 tablespoon olive oil (1 turn of the pan) then arrange the sliced dogs in a single layer. 
  2. Sear them a couple of minutes on each side. 
  3. Butter the insides of the buns and place face up on the Skillet. Sprinkle the cheese into it and Cover
  4. Heat until the cheese melts and the buns are toasted, 3 to 5 minutes


Place one sausage in the bun
Top with seasoned onion, pickled jalapeno, cilantro 
Squeeze mustard sauce and mayo on top of that
Then place one more sausage on the top of that

And your ultimate breakfast hot dog is ready :)

MOONG DAL KHASTA KACHORI Recipe

After working hard whole day when you return to your home, you may want to get all your
 work done by some Genie ;) and you make your sleeping or living area comfortable and relax.

I had the same feeling in the evening...Husband ji will return late from office (So he will not be helping in dinner preparation ;) :P  )


At the same time I wanted something tangy sa...I wanted to make some savory recipe that will make me to forget everything ... hence was wondering what will fill that bill. 

Finally banged on Kachoris and sweet tamarind chutney and dahiwale aloo ki Subzi...
I am sharing the Kachori recipe here...ll share tamarind chutney and dahiwale aloo ki sabzi recipes in upcoming blogs :)


MOONG DAL KHASTA KACHORI Recipe


INGREDIENTS


For Dough :

Maida-250 grams
Chilling cold water to knead the dough
Ajwain-1/4 teaspoon
Oil-1-2 tablespoon
Salt-1 teaspoon

For Stuffing :


Split Moong Dal (yellow) - 1 cup

Cumin Seeds - 1 tsp
Coriander Leaves - 2 tsp chopped fine (opt)
Green Chilli - Ginger paste - 1 tsp
Saunf / Fennel seeds powder - 1 tsp
Garam Masala - 1/2 tsp
Red Chilli powder - 1/2 tsp
Mango powder / Amchur - 1 tsp
Oil - 1 tsp
Salt to taste


METHOD


Dough Preparation:

  1. Take maida & add oil to it. Mix well with the hands & then add 1/2 teaspoon salt & ajwain.Mix well
  2. Knead the dough for kachoris using chilling cold water (Don't knead it too much, just use a light hand)
  3. Keep it aside for around 20 mins and cover it with a wet muslin cloth for 1 hour
Stuffing Preparation:
  1. Soak 1 cup Split Yellow Moong dal with enough water for 1 hour
  2. Drain the water well and Grind the dal to a coarsely
  3. Heat oil in a pan and add the cumin seeds
  4. Once the seeds splutter, add the dal and lower the heat and keep stirring for 5-6 minutes till the dal stops sticking to the pan
  5. Cook on low flame till the dal turns slightly brown
  6. Add all the masalas and cook for few minutes till the aroma of the spices hit you
  7. Add Salt and mix well
  8. Remove from heat and keep aside to cool

Kachori Preparation:

  1. Pinch a small ball from the dough and flatten the sides and make bowl shape with the ball
  2. Scoop a little of the stuffing and fill the cup in the middle 
  3. Gently close from the sides and ensure the filling is covered on all sides
  4. Make the ball fully covered on all sides by pressing or gently circling between your palms
  5. On a flat surface, gently press it down
  6. When you have enough to fry, heat a kadai and simmer to low when the oil is really hot
  7. Fry these stuffed moong dal kachori's on medium-low heat. After they start to puff, slowly turn them over to the other side. Fry until golden-brown on both sides

Serve the Moong Dal Khasta Kachori with yogurt/ Green Chutney/ Tamarind Chutney and chopped onion or with Aloo ki sabzi :)

Keep exploring the tastes :)