Monday, January 26, 2015

Homemade Brownies


I read somewhere that one of the ways you can help curb cravings for unhealthy foods is to commit to cooking/baking them at home rather than going to a fast food restaurant or buying pre-packaged sweets.  This has helped me to lot extent with my cravings lately. Mostly on weekends, i get to create in kitchen...used to explore the new options for recipes.

This time i picked up brownies. Moist and chewy, these brownies will be a hit whether as an afternoon snack or topped with ice cream and served as an after dinner dessert.

I made these yesterday and they turned out so gorgeous.  The flavor was awesome.

I decorated them with homemade chocolate frosting. Also tried with homemade chocolate ice-cream and cherries. They were just delicious. YUM-MY 


Ingredients:

Butter 1 cup 
Granulated sugar 3/4 cup 
Light brown sugar 1/4 cup 
Vanilla extract 2 tsp 
Large eggs 4
Unsweetened Cocoa 3/4 cup 
All-purpose flour 1 cup 
Baking powder 1/2 tsp
Salt 1/4 tsp 
Chopped walnuts 1 cup 
Semisweet chocolate chopped 150 grams 

Method:


  1. Melt the butter and chopped chocolate in a saucepan, stirring constantly, about 5 minutes. 
  2. Remove from the heat, pour into a large mixing bowl, and allow to slightly cool for 10 minutes.
  3. Adjust the oven rack to the lower third position and preheat oven to 350F degrees. 
  4. Line the bottom and sides of a 9x9 inch square baking pan. Set aside.
  5. In a different bowl take eggs and whisk it.
  6. Add the granulated sugar and brown sugars into the eggs, whisk until smooth. 
  7. Pour this mixture into the chocolate butter mixture.
  8. Whisk in the vanilla. Gently add in the flour, cocoa powder, and salt. 
  9. Once combined, add in the walnuts.
  10. Pour batter into the prepared baking pan and bake for 35-36 minutes. 
  11. A toothpick inserted in the center should come out with only a few moist crumbs when the brownies are done. 
  12. keep checking on brownies after 25 minutes and use the toothpick test to see when yours are finished.
  13. Allow the brownies to cool completely in the pan set. Cut into squares. 
The brownies will stay fresh in an airtight container at room temperature for 1 week. If freezed it will stay up to 2 months.


Saturday, January 24, 2015

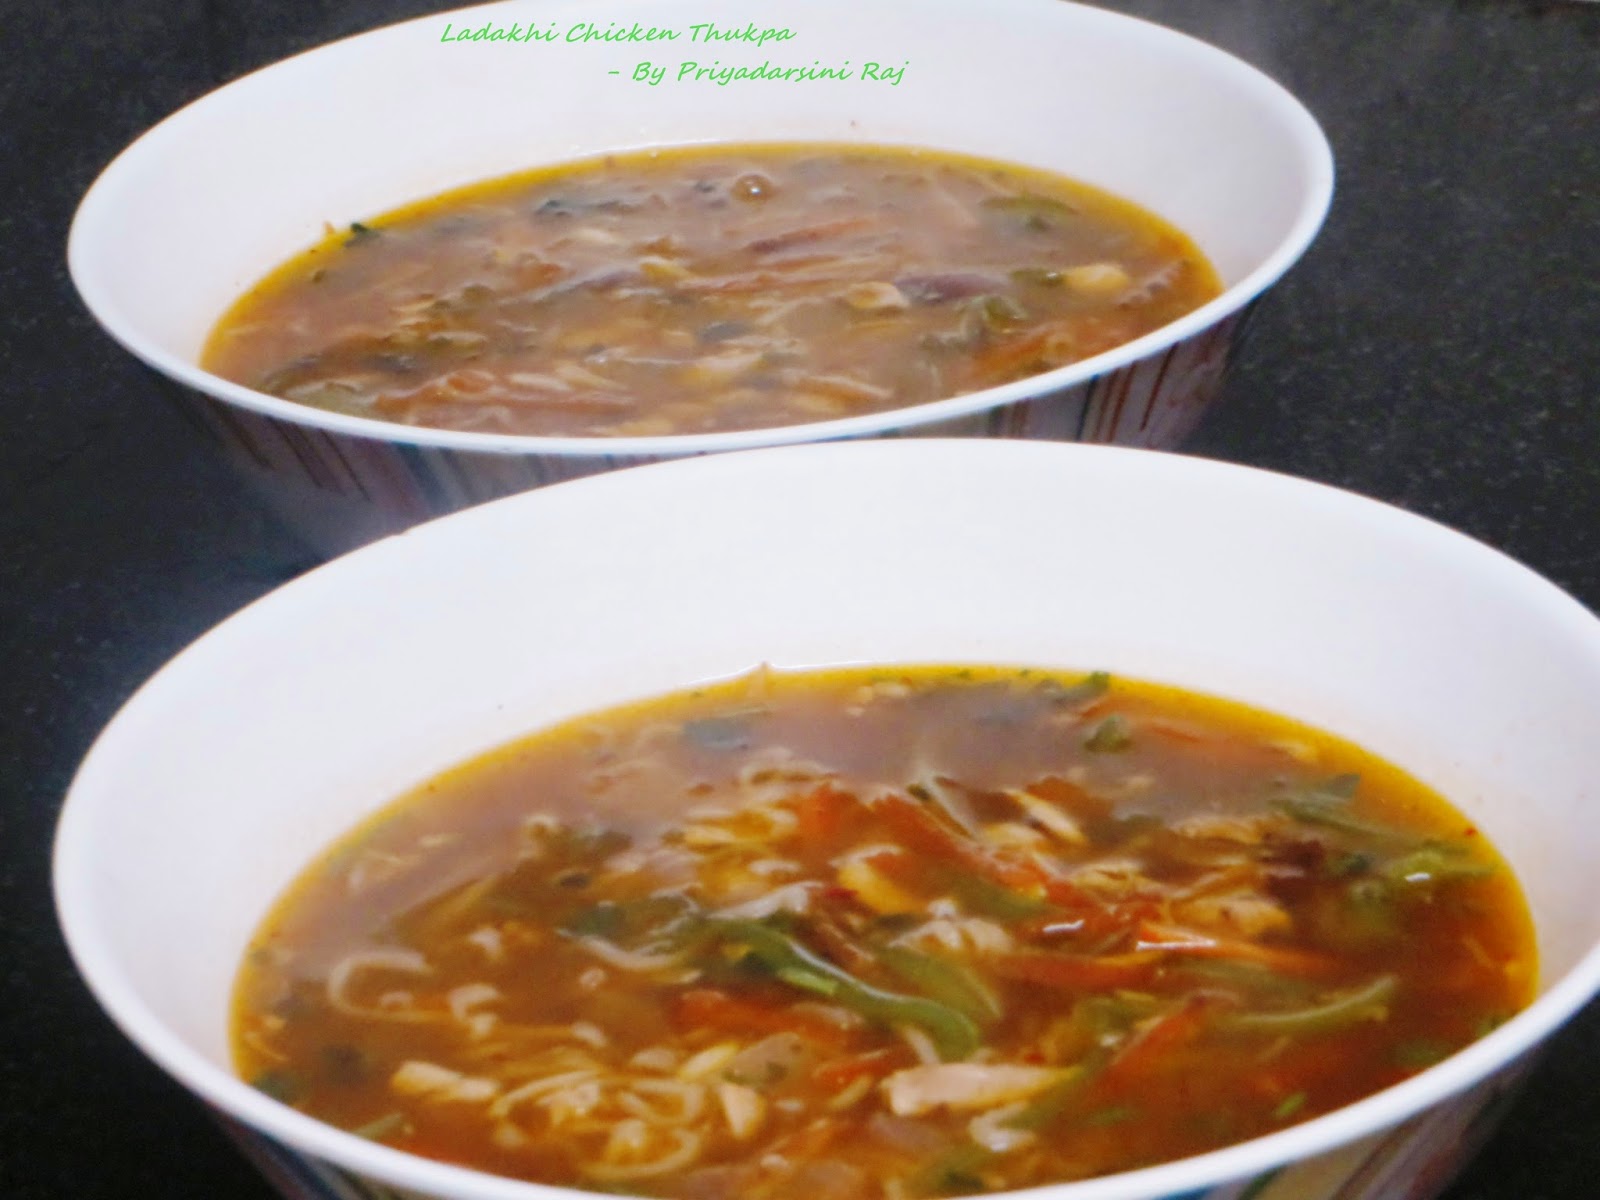
Chicken Thukpa - Ladakhi Style

It is popular in Tibet, Bhutan, Nepal, and some parts of India. "Thuk" means heart so it is a heart warming dish. Fragrant, hearty and simple to prepare, this hot bowls of thukpa recipe is an easy midweek winter warmer.  Ultimate bliss on a cold winter day.
The first time I had this soup was in one of small outlet in a mall, the name itself got me interested as to what it might be,and I haven't forgotten the taste ever since.
Then i heard my mother-in-law talking about this recipe she had it in Darjeeling.
Out of sheer curiosity, i started research on it and got to know more about it.
What i love about this recipe is that all the ingredients of this soup are so handy, can make them anytime. You dont have to put much effort to make it tasty. In which way you prepare it, it will never disappoint you in terms of flavours and taste.
This recipe ingredients varies from region to region.
I have followed Ladakhi style.
A very good recipe. Very simple and makes a good weeknight dinner. As is I would say the below measurement feeds 2 people max, so u may want to double it for more people. Also if kids r going to be eating it, wld suggest adding chillies only in the garnish and not in the soup, as it becomes quite spicy. 

Enjoy this simple and easy to make and no-frills Thukpa and stay a little warmer in these cold days.


Ingredients:

Chicken legs  2
Onion 1
Carrot 1
Green Bell pepper 1
Ginger 1 inch
Spring onions 7
Green chilies 3
Coriander leaves
Garlic 4-5 cloves 
Salt
Lemon 1 tbsp
Water 500 ml 
Soy sauce 1 tsp
Olive oil 2 tbsp 
Handful of egg noodles (or regular noodles)

Method:
  1. Take chicken legs in a stockpot. Pour water into the stockpot to cover the chicken completely. Cover the stockpot and boil the chicken on medium heat.
  2. (Optional: You can add a bit of Salt, a Bay Leaf, Cinnamon Stick, 2 Cloves, Quarter Onion, 2 cloves of Garlic, a small pc. of Ginger to water while boiling chicken)
  3. Once the Chicken is cooked, remove and allow it to cool down and remove the bones from boiled chicken leg, shred or cut to pieces. 
  4. Transfer the stock in another bowl. Reserve it. 
  5. Julienne ginger. Cut carrots into fine little sticks (1 and 1/2 inch). Slice the bell pepper vertically.
  6. Chop 5-6 spring onions and halve 3 green chilies. Finely chop 4-5 garlic cloves.
  7. Heat 2 Tbsp olive oil and add the chicken cubes. (You can fry till it turns golden brown, i prefer not to fry it so much)
  8. Now add chopped onion and sliced carrot to the chicken.
  9. Then add ginger, garlic, spring onions, bell pepper and green chilies. 
  10. Sprinkle salt, pepper and some fresh coriander leaves and saute.
  11. Add the reserved stock and let it simmer for about 2-3 minutes.
  12. Squeeze in 1/2 lemon.
  13. Add 1 tsp of soya sauce.
  14. Stir the broth gently and cover it. Let it simmer away for 10 minutes.
  15. Add handful of egg noodles in the broth and cook for 5 minutes.
Garnish with some spring onions, green chili and fresh coriander.

Friday, January 23, 2015

Crispy Hash Breakfast Skillet


Tender-but-crispy hash brown along with crunchy bell pepper and bacon with a luscious baked egg in the middle.


These are awesome! So creative and perfect dish. You have breakfast. Or brunch, or a snack. Whatever time you decide to eat this, you will be munching happy.
when I first decided to try these out, I was so excited.
These looked great and I couldn't wait to surprise Hubby with them.

I have to begin with the hash. First I tried grating potato from a raw state.
Squeezing them to release as much liquid as possible before they are cooked. 
This makes sense. Potatoes are loaded with moisture, which makes browning difficult. 
By getting rid of excess water, the potatoes should brown more evenly and quickly.
Then baked them until they were not quite tender enough to eat, Soft.
The consistency was perfect and the potato flavor was fabulous.(But i did not get the desired brown color :( )
I seasoned it with freshly ground black pepper.

Then I added rest ingredients. The original recipe only has bell pepper and bacon.
I added mushroom and tomato to add more flavours to this recipe. 

Cracked the egg and baked it
Ta-da. Its ready. A golden crust tops a savory egg mixture of cheese, hash-brown potatoes and spices in this wonderful way to start the day!  A slice of whole grain bread, a glass of orange juice. An energizing breakfast.
Got a YUM-MYY from my husband!


I tend to gravitate towards poached eggs and their evenly cooked whites and soft creamy yolks. Hence this recipe grabbed the showstopper position in the breakfast menu :)

These look like a sure winner for kid's breakfasts, lunches or suppers!! They will love it!
Try it and be happy :)


Ingredients:

Medium Russet  potatoes (or sweet potatoes) 2 
Bacon 3 strips 
Large bell pepper, chopped 1  
Chopped Mushroom 2 tbsp
Chopped Tomato 2 tbsp
Salt 1 tsp
Ground pepper 1/4 tsp 
Eggs 4 
Shredded smoked gouda cheese 1/3 cup 
Chopped parsley (optional)

Methods:

  1. Wash and scrub the potatoes clean.
  2. Shred the potatoes by using the largest holes of your box grater.(You can peel them or leave the peels on, whichever you prefer. I always prefer to have skin)
  3. Place the shredded potato in a large bowl lined with a paper towel. 
  4. Press down hard so the paper towels can absorb a lot of the moisture. Squeeze more using more paper towels if necessary. (Or you can wrap shredded potato up in a kitchen towel, and squeeze them out over the sink/ reuse in any other recipe)
  5. Transfer the shredded potatoes to a plate and Cook in the microwave on high for 2 minutes. Set the potatoes aside.
  6. Place a skillet on the stove.
  7. Before you turn the heat on, put your three strips on the pan. Keep the flame low.
  8. Cook the bacon on both sides just before they become crispy. 
  9. Remove from heat, reserve the grease, and set bacon on a plate. Once the bacon is slightly cool, chop it up.
  10. Preheat oven to 400F degrees.
  11. Turn the stove heat up to medium. When bacon grease begins to simmer, add the shredded potatoes. 
  12. Mix well. Allow to cook for about 2 minutes. 
  13. Add chopped mushroom and cook it for 1 minute. 
  14. Add the chopped pepper, salt, and pepper. Stir it around once or twice. Allow to cook for 3 minutes. Stir again, then allow to cook for 2 more minutes till the potatoes turns slight brown. 
  15. Stir in the chopped bacon and cook for 2 minutes.
  16. Add chopped tomato and stir once. Remove skillet from the heat and flatten out the top of the hash. 
  17. Make 4 shallow indentations into the hash using the back of a spoon.
  18. Top with shredded cheese.
  19. Crack an egg into each indentation.  
  20. Transfer skillet to the oven and bake until the egg whites set. (It will take about 8-10 minutes) Season with salt and pepper to taste and top with the parsley.

Serve immediately.


Notes:

  1. If you do not wish to add bacon, you may leave it out. Since potatoes are cooked in the bacon grease, instead you may use 2 Tablespoons of unsalted butter.
  2. You may use your favorite cheese instead of gouda cheese. 

Aloo Gobhi Kasha Recipe


Aloo gobi recipe is made in many many ways all over india. In odisha, we have a special type of preparation- Aloo Gobhi Kasha. This is one such basic Indian dish, which is not just delicious but healthy as well. The potato and crunchy cauliflower coated in the aromatic spicy dry gravy is simply treat to the taste buds. The flavour of garam masala compliments the taste of fried crunchy cauliflower. 
You can prepare it with simple ingredients - onion, chilli, garlic, ginger.
I added some dry roasting masala to make it full of flavours and different combi of tastes n flavours will burst into your mouth.


Ingredients:

Large Potato 1 (cut it into 6 pieces)
500gms Gobi (Cauliflower florets) 
Oil to fry
Large onion 3 (chopped)
Finely chopped Ginger and Garlic 1 and 1/2 tbsp
Cumin seeds 1/2 tsp 
Chopped green chillies 2 tbsp
Medium sized Tomato 1 (chopped)
Coriander paste 1/2 tsp 
Cumin paste 1/2 tsp 
Turmeric paste/powder 1/2 tsp 
Chopped coriander leaves 1 tsp 
Salt To Taste


For Dry Masala 

Ingredients :

5 cloves
10 black peppercorn
4 cardamon pod
2" cinnamon stick
2-4 Tbsp chilli powder
4 Tbsp coriander seed
1 tsp fennel seed
1 whole star anise
1 tsp turmeric powder
1 cassia leaf
1/2 tsp Kasuri Methi


Method for Dry Roast Spices:

  1. Partially roast the whole spices over low to medium heat until fragrant. Leave to cool.
  2. Grind until fine with a coffee grinder.
  3. Store in an airtight container and use as required.
Method for Aloo Gobhi Kasha:
  1. Heat oil in a wok/skillet till it shimmers.
  2. Add the cauliflowers in the hot oil. Cook at high heat about 5-6 minutes.
  3. Lower the flame, sprinkle 1 tbsp of salt on it and fry it till it becomes tender.
  4. Repeat steps 1-3 for frying Potato 
  5. Heat the oil in a large frying pan and fry the cumin seeds for about 2 minutes, until they begin to splutter. Add the green chilli and fry for a further 1 minute.
  6. Add chopped onion, fry it till it becomes soft and turns golden brown.
  7. Add chopped ginger garlic to it and cook it till their raw aroma goes away.
  8. Add chopped tomato and cook it till the tomatoes soften and become pulpy.
  9. Add 1 tbsp of Dry roasted spices, coriander paste, cumin paste and turmeric powder and keep stirring at intervals and continue to saute the masala mixture till the fat starts to leave the sides. 
  10. Add fried cauliflower florets, potato cuts and add 1 tbsp water. Season with salt as per taste.
  11. Mix well and cover it for 2 minutes.

Garnish the aloo gobi with coriander.


Serve aloo gobi kasha with rotis, parathas or naan. You can also serve aloo gobi curry with steamed basmati rice or jeera rice.

Wednesday, January 21, 2015

Raw Papaya Kababs


You must be thinking what a weird recipe it is...
I was going through some healthy recipes by Chef Kunal Kapoor. I came across this recipe.
A very different preparation with the raw papaya.
Papaya is not just a treasure-trove of nutrients but an irresistibly tasty food too. Whether raw or ripe, it finds use in many dishes ranging from salads to subzis. 

Ingredients:

Thick grated Raw papaya – 2 cups
Thick grated Raw potato – 1 cup
Besan – ½ cup
Eggs – 1 no
Ginger chopped – 2 tbsp
Jeera – ½ tbsp
Crushed Coriander – 2 tbsp
Red chilli powder/ Chopped Green Chillies – 1 tbsp
Lemon juice – 1 tbsp
Green coriander chopped – 2 tbsp
Turmeric – ½ tbsp
Salt – 1 tbsp
Canola oil – 2 tbsp


Methods:


  1. Take grated raw papaya and raw potato in a bowl and add salt.
  2. Set it aside for 5 minutes. 
  3. Gently press them to release the excess water and strain the mixture on a paper towel.
  4. Now in a large bowl mix all the ingredients except the oil.
  5. Add the raw papaya and potato. 
  6. Mix well and make rough thin patties. 
  7. Heat a pan and add the canola oil. 
  8. When hot, slide the patties into the pan and cook well on both sides.
Serve hot with a lemon wedge.


Thursday, January 15, 2015

Onion Pakora


Onion Pakora / Fritters are very easy to prepare and requires less effort. 

INGREDIENTS:

Large sized onions 2 
Gram flour 1 cup (I prefer to add 1/2 cup only, so that onion texture and taste will be prominent)
Green chilies  2 (or ½ tsp red chilli powder)
Chopped coriander leaves (optional) 1 tbsp
Turmeric powder(optional) ¼ tsp
Carom seeds 1 tsp 
Asafoetida/hing (optional) a generous pinch
oil for shallow frying or deep frying
Water as required to make a medium thick batter
Salt as required


METHOD:

  1. Slice the onions thinly and take them in a bowl. 
  2. Add chopped green chilies. (Optional : you can add chopped coriander leaves, red chilli powder)
  3. Add carom seeds, turmeric powder, asafoetida and salt.
  4. Mix well. Keep the onion mixture for 5 minutes. ( As the onions would release water and then you can add water as required in the batter.)
  5. Add gram flour and add required amount of water to make medium thick batter.
  6. Stir the mixture very well with a spoon or with your hands. Now the batter is ready.
  7. Heat the oil, add spoonfuls of the batter. (Depending on the size of the kadai or pan, you can add less or more fritters/pakoras, don't over crowd the pakoras while frying.)
  8. Deep fry pakoras till it turns golden brown, turn over with a slotted spoon and continue to fry.
  9. Turn the pakoras few times for even frying.
  10. Fry the onion pakoras, till they look crisp and golden evenly.
  11. Remove them with a slotted spoon and drain them on kitchen paper towels for excess oil to be absorbed.
  12. Fry slit green chilies in the same oil.
  13. Sprinkle some salt on the green chilies and mix well.

Serve onion pakoras or kandi bhaji or onion fritters with the fried green chilies or mint chutney or tomato sauce.


TIPS:
1. Slice the onions thinly as thin slices will get cooked faster than thick slices and while frying the gram flour gets cooked but the onion slices remain half cooked if sliced onion is thick.
2. You can use a pinch of baking soda in the batter to add that extra crispiness to the pakoras. 
3. You can add 1 or 2 teaspoon of oil  in the batter. This makes the onion pakoras crisp and it absorbs less oil while frying. 

Wednesday, January 14, 2015

Veg Manchurian with Gravy


Veg Manchurian is an indo chinese fusion recipe. Indo chinese fusion?!?!

It is nothing but a technique where chinese dishes are customized on to the indian taste.
This vegetable manchurian is one such recipe. Deep fried vegetable balls dipped in gravy/soup served with noodles or fried rice or Roti...

A healthy recipe and popular Indian-Chinese staple cooked with fresh mixed vegetables and crunchy capsicum. This dish not only pleasing to the eye but also are yummy and nutrition wise a big thumbs up to it. Vegetable ball you can take any vegetable available in your local


Ingredients:

For The Vegetable Balls
Finely chopped cabbage 3 cups 
Grated Carrot 1 1/4 cups  (I prefer to chop)
Finely chopped bell pepper ½ cup 
Finely chopped spring onion/scallion greens ¼ cup (or you can take 1/2 cup chopped onions)
Cornflour 2 tbsp 
Plain flour 5 tbsp
Finely chopped garlic 1 tbsp
Finely chopped green chillies 2 tsp 
Salt to taste
Oil for deep-frying

For The Sauce
Finely chopped garlic  1 tbsp 
Finely chopped green chillies 2 tsp 
Finely chopped ginger 2 tsp 
Onion or spring onion 2 tbsp 
Finely chopped celery (optional) 1 tbsp 
Clear vegetable stock or water 1 cup 
Soy sauce 1 tbsp 
Vinegar ½ tbsp 
Cornflour  1 tbsp (dissolved in 2 tbsp water)
Freshly crushed black pepper ½ tsp
Sugar 2 pinches (optional)
Oil 2 tbsp 
Salt to taste

Method:

For the vegetable balls

  1. Combine all the ingredients (listed under vegetable ball list) in a bowl and mix well using your hands. Keep aside for 15 minutes.
  2. Shape spoonfuls of the mixture into small balls.
  3. Deep fry a few balls at a time in hot oil until golden brown. 
  4. Drain on absorbent paper and keep aside.


For the sauce

  1. Heat the oil in a wok or frying pan on a high flame. 
  2. Add the onions, ginger, garlic, chilies, celery and stir fry over a high flame for a few seconds. (No need to brown them)
  3. Add the stock, soya sauce, crushed black pepper.
  4. Add the cornflour paste to thicken the sauce.
  5. Thicken the sauce to your desired consistency. (You can add water if you dont want to have thin sauce)
  6. Add vinegar, salt, sugar and simmer for a few minutes.
  7. Add fried veg balls and simmer for a minute

Serve veg manchurian garnished with spring onion greens.


If you want crispiness in the veg ball along with gravy, then just before serving, put the vegetable balls in the sauce and bring to a boil. Serve hot.

Spicy Coconut Chutney

This is the most favourite accompaniment to go with south indian snacks like dosas, idlis , medhu vada. The coconut chutney tastes best when consumed fresh. Its not advisable to keep chutney for long outside.
If you add tamarind to add sourness, then you can store chutney for 1 more day coz chutney does not spoil quickly as you add tamarind to it.

You can achieve sourness in chutney either by adding Tamarind or curd/yoghurt.


INGREDIENTS: 

For the Chutney:
Fresh grated coconut/desiccated coconut 1 cup 
Roasted chana dal 2 tbsp 
Green Chili 2
Ginger ½ inch 
salt

For the tempering:
Urad dal 1 tsp 
Mustard seeds ¾ tsp 
Cumin seeds ¾ tsp 
Curry leaves 1 sprig
Asafoetida a pinch 
Red chili as a whole 1 
Oil 1 tbsp 

METHODS:

  1. Grind together all the ingredients for chutney with little water to get smooth consistency.
  2. Heat oil in a small pan. 
  3. Add the mustard seeds. When they splutter, add the cumin seeds and urad dal. Fry till the urad dal till it becomes brown.
  4. Add the curry leaves, red chili and asafoetida.
  5. Fry for a minute. Then pour the tempering on the coconut chutney. (Do not pour chutney in pan)
  6. Mix it well with the coconut chutney.
Serve coconut chutney with any idli, dosa or vada.

Soft Idli recipe


IDLI IS A WHOLESOME MEAL FOR THE BREAKFAST. Nothing is better than a soft idli with a bit spicy , loads of coconut, tempered along chana dal & garlic. to die for. By this u can say I am the die heart fan of Idli and extra coconut chutney.

I would see the way my mom would soak the rice, dal and then grind it and then leave it to ferment. She used to put damp muslin cloth on idli mould and used to steam idli. this was a regular festive ritual in my house and i knew that we would get steaming hot soft idlis or dosa with chutney for breakfast.

I was thinking that time its very easy to prepare idli...when i actually started preparing the batter and then idly...then i came to know its easy to make batter but not so easy to make soft and fluffy idlis

As far i know fomentation is important to get best results for idlis and dosa...so definitely temperature and favourable environment for wild yeast to ferment is really needed

After so much of research on this, i got some ideas to make idli soft and fluffy
1. Add handful poha/cooked rice
2. Methi seeds with urad dal and poha

I went for 2nd option. Finally i got the desired textures for idli and even dosa became crisp and got beautiful golden color


INGREDIENTS:

Basmati rice or sona masoori rice or regular rice 2 cup 
Urad dal/black gram( skinned whole or skinned spilt) ½ cup 
poha/flattened rice ¼ cup 
fenugreek seeds ¼ tsp 
water as required
salt
oil to apply to the idli moulds

METHODS:
  1. Take both the rice and urad dal in different bowl and wash them.
  2. Soak the rice and poha in water for 6 hours.
  3. Soak the urad dal with methi seeds separately for 6 hours.
  4. Drain the soaked urad dal. reserve the water.
  5. Grind the urad dal, methi seed with some of the reserved water till you get a smooth and fluffy batter.
  6. Grind the rice to make a smooth batter.
  7. Mix both the batters in a large bowl. Add salt and mix well.
  8. Cover and let the batter ferment for 8 hours. In cold temperatures you can easily keep the batter for about 12-16 hours or more. (The batter will become double in size and rise after the fermentation process is over.)
  9. Mix the batter gently.
  10. Grease with oil the idli moulds and pour the batter in the moulds.
  11. Steam the idlis in a steamer for 10-12 mins or until the idlis are done.
Serve the steaming hot idlis with coconut chutney and sambar.

Note:  You can store the batter for 2-3 days.

Sunday, January 11, 2015

Besan Murukku


INGREDIENTS:

Besan/Chickpeas Flour 1 Cup
Oil 2 tbsp 
Fresh Peppercorn Powder 1/2 tsp
Turmeric Powder 1/4 tsp
Carom Seeds 1/2 tsp
Cumin Seeds 1/2 tsp
Soda-Bi-Carb a Pinch 


Salt to Taste
Water as Needed (approximately 1/4 cup)
For Deep Frying - Oil

Besan-Murukku-Easy-Murukku-Recipe 

METHOD:

Take besan in a bowl and add all the ingredients 
Mix everything together well.
Add warm water 1 tbsp at a time and start kneading dough, don't add all the water together but slowly add as needed. 
Once dough starts to come together just keep kneading for 2-3 mins and make sure to make it tight dough 

Heat oil for deep frying in a kadai and fill dough in machine using star blade/disc 
Press to make in circular murukku directly over oil
Make 4-5 murukku in a batch if using medium size kadai/wok, don't over crowd the kadai.
Fry in medium heat until golden brown or bubbles ceases, 
don't turn murukku immediately after dropping in oil it will break in pieces. Once murukku made wait for it to cook little so murukku can hold shape.
Drain in colander lined with kitchen tissue, repeat same for rest of dough.
Once murukku/chakli comes to room temperature store in air tight containers. 
Murukku can be stored for around 2 weeks or more.

Note

You can add 1/2 tsp red chili powder instead of pepper powder.
You can add 1 tsp garlic powder or garlic paste to make it as garlic besan murukku.
Don't skip carom and cumin seeds.


Friday, January 9, 2015

Malai Kofta Curry


The secret of  Maa's cooking!! It's not just about recipe...something extra ordinary!! She never use much ingredients neither something beyond imagination, she uses the ingredient whatever is available in local market. Still she manage to create some magic while preparing food..In each bite you will find "swad" the Taste and the aroma, that you can sense before entering your home. And the moment she opens the door, you feel like jumping on dining table.  For some dishes, I follow her recipe blindly and "Chhena Kofta" (Cottage cheese ball curry) is one of those. And to my surprise my husband could not stop from finishing all those tiny wonder balls within minutes.

In odisha, its popular as Chhena bara tarakari, Chanar dalna in bengali and Kofta curry in all over india.

Sharing here the magical recipe with you all
Try it and spread that magic on your dining table :)


INGREDIENTS:

For the kofta:

    Full Cream Milk 1ltr
    Medium size potatoes, boiled, peeled and mashed 1
    Red chili powder  ¼ tsp 
    Rava 1 tbsp
    Salt ¼ tsp
    Almond flour ¾ tbsp or ½ tbsp amul powder
    Oil for shallow or deep frying the koftas

For the gravy/curry:

    Chopped onion 2 tbsp
    Onion paste  ½ cup 
    Tomato puree ½ cup 
    Red chili powder ¾ tsp 
    Ginger garlic paste 1 tbsp
    Garam masala ¼ tsp 
    Cashew paste 1 tbsp
    Water 2 cups 
    Kasuri methi/dry fenugreek leaves 1 tsp 
    Salt as required
    Sugar as required (optional)
    Oil 2tbsp

Spices for dry grind:
   
    1 bay leaf
    1 inch cinnamon
    1 or 2 Cardamom
    A pinch of mace/jayitri
    2-3 cloves/laung

  
METHOD:
  1. Dry roast the spices and grind them to a powder in a grinder. Store it in an air-tight container.
  2. Boil milk in a pan and during the process of boiling, add lime juice/ curd to it. 
  3. Stir with spoon gently for a minute or so to curdle the milk. 
  4. Turn off the heat. It will make chana/cottage cheese.
  5. Now pour this chana/cottage cheese to a muslin cloth and squeeze out all the water. And put some weight on it to squeeze out water completely. 
  6. Take chhana in a bowl and add mashed potato, rava, red chili powder, almond powder.
  7. Knead the mixture with 1/4 teaspoon salt to a smooth lump-free dough.
  8. Make small balls from the dough and flatten them with hands to give it desired shapes. The texture of the koftas should be firm.
  9. Fry the koftas in medium hot oil till golden. Keep aside.
  10. Remove extra oil from the same pan and keep about 2 tbsp oil.
  11. First add the chopped onion, fry it till it browns.
  12. Add onion paste and brown it.
  13. Now add the ginger-garlic paste and fry for some seconds till the raw aroma of the paste goes away.
  14. Add the tomato puree and saute for 2-3 minutes.
  15. Add the turmeric powder, red chili powder, garam masala powder and cashew paste.
  16. Stir and saute till the oil starts to leave the sides of the masala paste. 
  17. Add water and stir.simmer till the gravy begins to thicken. takes approx 11-12 minutes on a low flame.
  18. Towards the end add crushed kasuri methi leaves and salt. 
  19. (Optional) you can also add sugar if you want a light sweet taste in the curry. simmer for 1-2 minutes more.
  20. Add the koftas in the curry if serving immediately and sprinkle the roasted spice powder.

Garnish the malai kofta with some coriander leaves. Serve malai kofta hot with rotis, naan, steamed basmati rice or jeera rice.

Note : You can garnish the malai kofta with some cream or grated paneer

Sunday, January 4, 2015

Moist Chocolate Cupcake with Vanilla Frosting


Rich, tender homemade chocolate cupcake topped with my favorite vanilla frosting

The special occasions present a pleasant break from the daily routine. My bestfriend's sister is in town and on the occasion of her birth day i wanted to gift her something really sweet and flavourful creation...
At the same time I wanted to try my hands on muffins for long time, I thought this will solve my purpose...
Super easy and super yummy chocolate coffee cupcakes make any occasions even more special! And the recipe didn't disappoint me.This cocoa-based cake is deeply chocolaty and incredibly moist.

It came out sinfully delicious, with simple ingredients. It is very easy in the sense the beginners in baking, like me, can try it out without giving a second thought.

Chocolate and coffee always make a super cool couple and they reach perfection in these chocolate coffee cupcakes! Coffee just deepens the flavour of the chocolate and the heat helps smooth out the batter and get rid of lumps.
Do you ever dip your chocolate into coffee to double your happiness ? You will have a similar feeling when you are devouring these cupcakes. 
Buttermilk is required for this recipe – the lactic acid present is what will allow the baking soda to react and leaven the cake.

I followed this recipe from 
http://foodess.com/6134-moist-chocolate-cupcakes-with-oreo-cream-cheese-frosting.html

Lovely blog with lovely bakery recipes

Instead of Oreo Cream Cheese frosting, I used vanilla frosting. 


Ingredients:

CUPCAKES

 Unsweetened cocoa powder 1/2 cup
 All purpose flour 3/4 cup
 Baking soda 1/2 tsp
 Baking powder 3/4 tsp
 Salt 1/4 tsp
 Large eggs (at room temperature) 2 
 Granulated sugar 1/2 cup 
 Light brown sugar 1/2 cup
 Melted butter 1/3 cup 
 Vanilla extract 2 tsp
 Buttermilk 1/4 cup 
 Hot coffee  (or 2 tsp instant coffee in 1 cup boiling water) 1/4 cup

VANILLA FROSTING

 Unsalted butter, softened to room temperature 1 cup 
 Confectioners' sugar 4-5 cups 
 Heavy cream 1/4 cup 
 Vanilla extract 2 teaspoons 
 Salt, to taste

Methods:
  1. Preheat the oven to 170C degrees. 
  2. Line a 12 cup muffin pan with cupcake liners. Set aside.
Make the cupcakes: 
  1. In a large bowl, whisk the cocoa powder, flour, baking soda, baking powder, and salt together until thoroughly combined. Set aside. 
  2. In a medium bowl, whisk the eggs, sugar, brown sugar, oil, and vanilla together until completely smooth. 
  3. Pour the wet ingredients into the dry ingredients. Beat it for 3 minutes
  4. Then take small amount of buttermilk. Gently stir about 5 stirs. 
  5. Repeat it till all the buttermilk is poured and mixed. The batter won't be very thick.
  6. Pour hot coffee in small amount and stir it. Repeat it till all the hot coffee is mixed.  (The batter for the cupcakes is very thick. Very thick – almost like frosting)
  7. Pour/spoon the batter into the liners - fill only halfway to avoid spilling over the sides. 
  8. Bake in batches for 20 minutes (Check by inserting a toothpick, if a toothpick inserted in the center comes out clean, then its done.)
  9. Allow to cool completely before frosting. 
Make the frosting: 
  1. Beat the butter until creamy - about 2 minutes. 
  2. Add confectioners' sugar, cream, and vanilla extract . beat for 3 full minutes. 
  3. Add more powdered sugar if frosting is too thin or more cream if frosting is too thick. 
  4. Add a pinch of salt if frosting is too sweet.
  5. Frost cooled cupcakes however you'd like.
Store cupcakes in an airtight container at room temperature for up to 2 days and in the refrigerator up to 5 days.


Friday, January 2, 2015

Delicious Butter Garlic Calamari


You can't just go wrong with butter and garlic combination for this calamari.
Being hedonist after my own heart, and this delicious recipe only goes to prove it. 
I can think of nothing better than feasting on massive amounts of calamari.
Keep the squid rings/calamari in the freeze, take it out in the morning at breakfast or let it thaw in time for the evening's meal or starter for party. You won't be disappointed ever. Easiest and the simplest recipe 

The infusing  flavour of the garlic into the squid will always be showstopper 


INGREDIENTS:

Squids ( cleaned and cut in rings) 2 cups 
Butter 2 tbsp 
Finely chopped/crushed garlic 1 tbsp
Pepper powder 1 tbsp
salt (as per taste)
oil

METHOD:


  1. Set the heat on a high 
  2. Take butter on pan and when it sizzles, add chopped garlic and saute it till it turns  light brown and butter is nicely flavored with garlic
  3. Season with salt and pepper
  4. Now add squid rings and toss them for 2 mins
  5. Remove from flame. Drain them on a oil absorbent paper. Serve them hot
You can sprinkle li'l amount of lemon juice on it, if you wish.

Note:
Squid ideally needs just a few minutes to cook. When over cooked it tends to turn chewy and rubbery.